Light Poles 101: Essential Knowledge for Property Owners and Contractors

When selecting light poles, it's essential knowledge to understand the important factors involved. This knowledge is equally crucial when installing them on your property. Your choices directly impact safety and security, and adhering to legal rules is vital. Many individuals turn to the Home page for guidance, while others seek information on the About Us page for clarity. However, it's best to consult your local zoning office before proceeding. This step is necessary before you begin your project. Every product you choose must comply with regulations and meet your specific needs.
Tip: Consult with your local officials before installing a light pole. This can help you avoid fines and other issues down the line.
Key Takeaways
Light poles are important for safety and security. They light up dark places. This helps stop accidents and keeps people safe from crime.
Always look at local rules before you put up light poles. Get the right permits first. This stops you from getting fined. It also makes sure you follow safety rules.
Pick the best light pole for your needs. Think about what it is made of. Look at how tall it is. Choose a design that fits the place you want to light.
Check your light poles often. Clean and fix them when needed. This helps them last longer. It also keeps your property safe.
Switch to LED lights that use less energy. They cost less to use. You do not have to change them as often. This saves money and helps the environment.
Essential Knowledge of Light Poles
Light Pole Functions
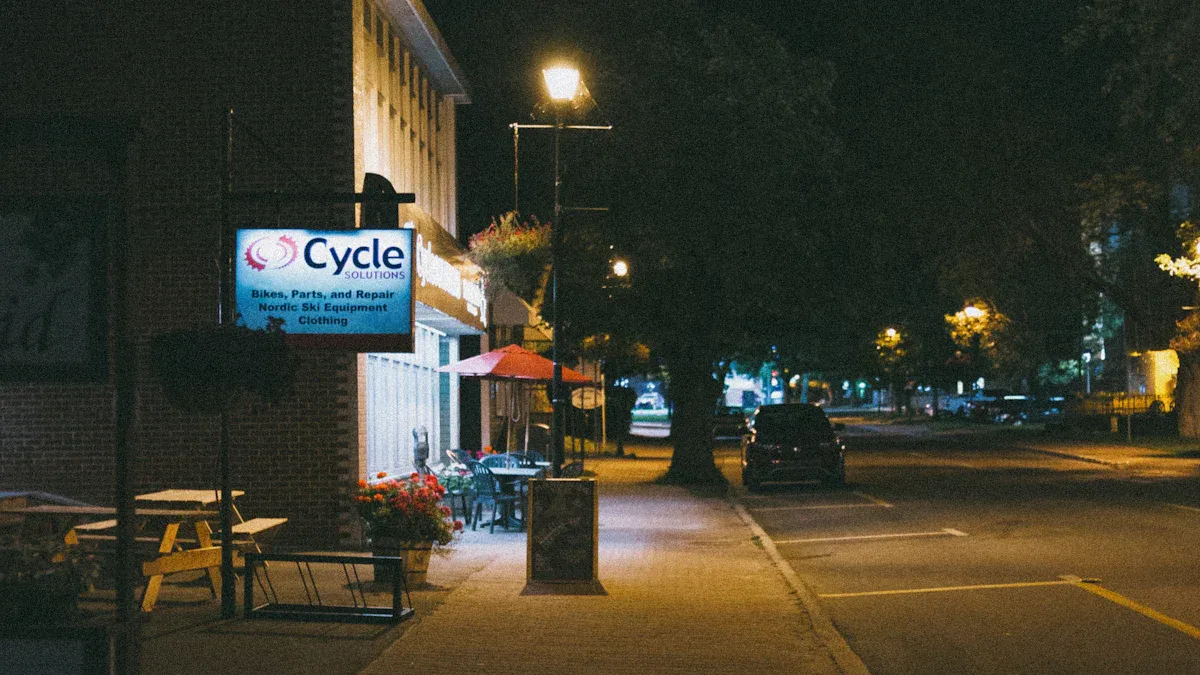
It is important to know about light poles before you start. Light poles have many uses in homes, businesses, and public places. When you put up light poles, you help people see better at night. This can lower the chance of accidents. Lighting up dark spots can also stop crime. Many light poles save energy because they use less electricity. These poles are strong and can last through bad weather. Light poles can make outdoor areas look nicer. They help show where to walk and move, making places feel friendly. Bright light poles get rid of dark areas and make paths and doors safer. Poles with motion-sensor lights can scare away people who should not be there. These lights only turn on when needed. Good lighting helps people spend more time outside and talk with neighbors.
Make places safer by helping people see at night
Stay strong and last a long time
Show where to walk and move
Get rid of dark spots for safer paths
Scare away intruders with motion-sensor lights
Help people enjoy being outside together
Key Parts of a Light Pole
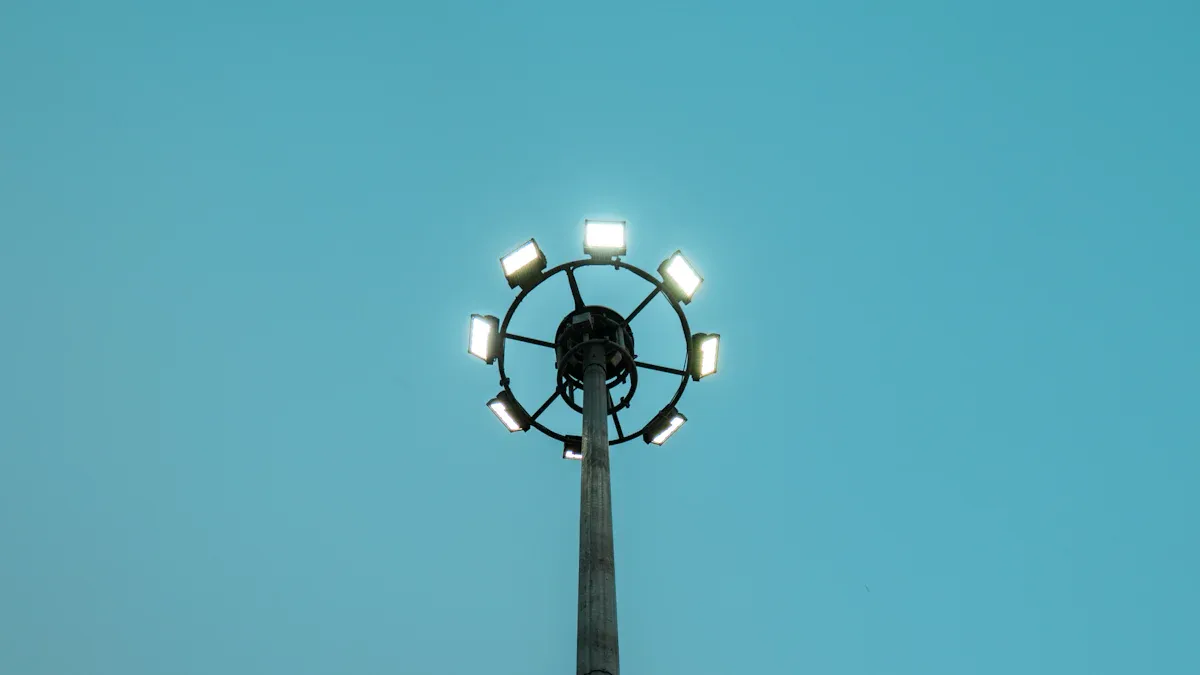
You should learn about the main parts of light poles. Every pole has a base, a shaft, and a fixture. The base holds the pole steady on the ground. The shaft keeps the fixture up and sets how high the light is. The fixture has the bulb or LED and points the light where you want it. Some poles have arms or brackets to hold the fixture out. You might see doors for wires and electrical work. All these parts work together to give good lighting.
Importance for Safety and Security
Knowing about light poles means you must think about safety and security. You need to wear gloves and safety glasses when you put up a pole. Use the right lifts and tools for heavy poles. Make sure all wires and connections follow local rules. The table below lists common dangers and ways to stay safe:
Safety Risk | Recommended Action/Control |
|---|---|
Tripping, pedestrians & traffic | Keep walkways clear and use traffic signs. |
Struck by falling objects | Wear gloves and keep the area clear. |
Manual handling, Falling from heights | Use ladders and be careful when lifting. |
Unsafe equipment, Overhead cables | Check cables before work and turn off power. |
Unauthorized access | Have a helper and make sure safety gear is on. |
Cable connections & testing | Make sure cables are off and marked. |
You need to get permits and follow rules before you install a pole. This helps stop accidents and keeps your property safe. When you follow these steps, you keep yourself and others safe and make your space better.
Types of Poles
Steel Poles
Steel poles are used most for outdoor lights. You see them in cities and big work areas. They are strong and hold heavy things well. Steel poles are good for backyards if you need sturdy lights. These poles last many years, but you must watch for rust. You have to follow rules when you put them up and take care of them. Steel poles work with LED pole lights, which save energy.
Aspect | Steel Poles |
|---|---|
Strength | Very strong, does not bend easily |
Cost | Cheaper at first, costs more later |
Maintenance | Check often for rust |
Lifespan | Lasts long if cared for |
Compatibility | Works with LED pole lights |
Tip: Check your local rules before you put up steel poles. This helps you avoid trouble.
Aluminum Poles
Aluminum poles are light and easy to carry. You can use them in your backyard, especially near the ocean. These poles do not rust, so they last longer in wet places. Aluminum poles cost more, but you do not spend much to keep them working. They work well with LED pole lights and follow many rules for places near the coast.
Feature | Aluminum Poles |
|---|---|
Weight | Very light |
Corrosion | Does not rust |
Lifespan | Can last 50 years or more |
Maintenance | Needs little care |
Compatibility | Great for LED pole lights |
Concrete Poles
Concrete poles are very strong and hard to break. You see them where there are strong winds or earthquakes. Concrete poles can last over 50 years if you look after them. They are heavy, so you need special tools to put them in. Concrete poles work with LED pole lights and follow strict safety rules.
Very strong and steady
Needs little care
Heavy and hard to put in
Can last 50 years or more
Fiberglass and Composite Poles
Fiberglass and composite poles are becoming more popular. These poles are light, strong, and do not rust. You can use them in your backyard if the weather is bad. Fiberglass poles need little care and last a long time. Composite poles have smart features and work well with LED pole lights. You must follow rules for new types of poles.
Feature | Fiberglass/Composite Poles |
|---|---|
Corrosion Resistance | Does not rust |
Impact Resistance | Very strong |
Weight | Very light |
Lifespan | Lasts long, needs little care |
Compatibility | Works great with LED pole lights |
Decorative Poles
Decorative poles make your property look nice. You see them in parks, gardens, and along paths. Decorative poles come in many shapes and colors. They work with LED pole lights and follow rules for public places. You can use decorative poles in your backyard to make it look special.
Many styles to choose from
Good for LED pole lights
Must follow local rules
Makes your place look better
Note: Always check your local rules before picking any light poles.
Choosing Light Poles
Assessing Location Needs
First, pick the best spot for your light poles. This helps keep your property safe. Think about why you need light in each area. Some places need bright light for safety. Other spots need softer light for a nice look. Check if every part gets enough light. Look at buildings and trees nearby. These can block light and make shadows. Do not put poles where they will not work well.
The table below lists things to think about when picking a spot for your light poles:
Factor | Description |
|---|---|
Purpose of lighting | Decide why you need light in the area. |
Coverage area | Make sure the light reaches every spot you want to illuminate. |
Existing infrastructure | Check for buildings, trees, or signs that may block light. |
Potential obstructions | Find anything that could stop light from spreading. |
Ground conditions | Test the soil to see if it can hold the poles safely. |
Permits and regulations | Get the right permits and follow local rules for safety. |
Pole height | |
Maintenance requirements | Plan for cleaning and repairs to keep your lighting solutions working. |
Think about the weather in your area. Rain, snow, and wind can hurt poles. Pick materials that do not rust and last a long time. Plan to check and fix your poles often to keep them safe.
Tip: Make a schedule for cleaning and repairs. Write down what you fix. This helps you find problems early and keep your lights working.
Determining Height and Design
Decide how tall your light poles should be. The height changes how much space the light covers. Tall poles light up big areas. This helps get rid of dark spots and keeps people safe. Short poles work better in small places. They give focused light and stop glare.
Here is a table that shows how height, spacing, and lumens change light coverage:
Mounting Height | Spacing | Lumens |
|---|---|---|
15’-20’ | 20’-30’ | 12,000-18,000 |
20’-25’ | 30’-40’ | 20,000-30,000 |
25’-35’ | 40’-50’ | 30,000-70,000 |
Space your poles about 2.5 to 3 times their height. This gives even light and keeps people safe. Pick a design that matches your property. Some places need simple poles for safety. Other places need fancy poles for style. Choose what fits your needs and looks good.
Note: The right height and design help make safe walkways, parking lots, and outdoor spaces.
Matching Pole Type to Application
Pick light poles that fit the area you want to light. Different places need different kinds of poles. Sports fields need tall, strong poles with bright lights. Parks and gardens use short, pretty poles for a nice look and safety. Streets and parking lots need poles that light up wide spaces.
Here are some examples for matching pole type to the area:
Residential streets use poles that are not very tall. These poles give enough light for safety.
Parking lots need tall poles with bright lights. This helps people see and stay safe.
Parks use short, pretty poles. These make the area look nice and keep it safe.
Sports fields need very tall poles. These hold strong lights for games.
Think about wind, ground, and why you need light. Pick poles that can handle the weather and fit the area.
Tip: Look at your property layout before you put in poles. This helps you stop shadows and keep every spot safe.
Local Codes and Regulations
Follow local rules when you put in light poles. These rules keep everyone safe. Check with your local zoning office before you start. This helps you avoid fines and problems. The National Electrical Code gives rules for electrical work. Article 410 tells how to put in lights and fixtures. Article 300 explains wiring. Article 250 covers grounding and bonding for outdoor lights. Local rules may limit pole height and energy use.
Here is a table that lists common codes and rules:
Code/Regulation | Description |
|---|---|
National Electrical Code | Main rules for electrical installations in the U.S. |
Article 410 | Rules for installing lights and fixtures. |
Article 300 | Methods for wiring and materials. |
Article 250 | Grounding and bonding for outdoor lighting solutions. |
Local Amendments | Extra rules for pole height and energy efficiency. |
Get the right permits before you put in light poles. Always follow local rules to keep your property safe and avoid trouble.
Alert: Always talk to your local zoning office first. This keeps you safe and makes sure your lights follow all rules.
Light Pole Installation
Permits and Legal Steps
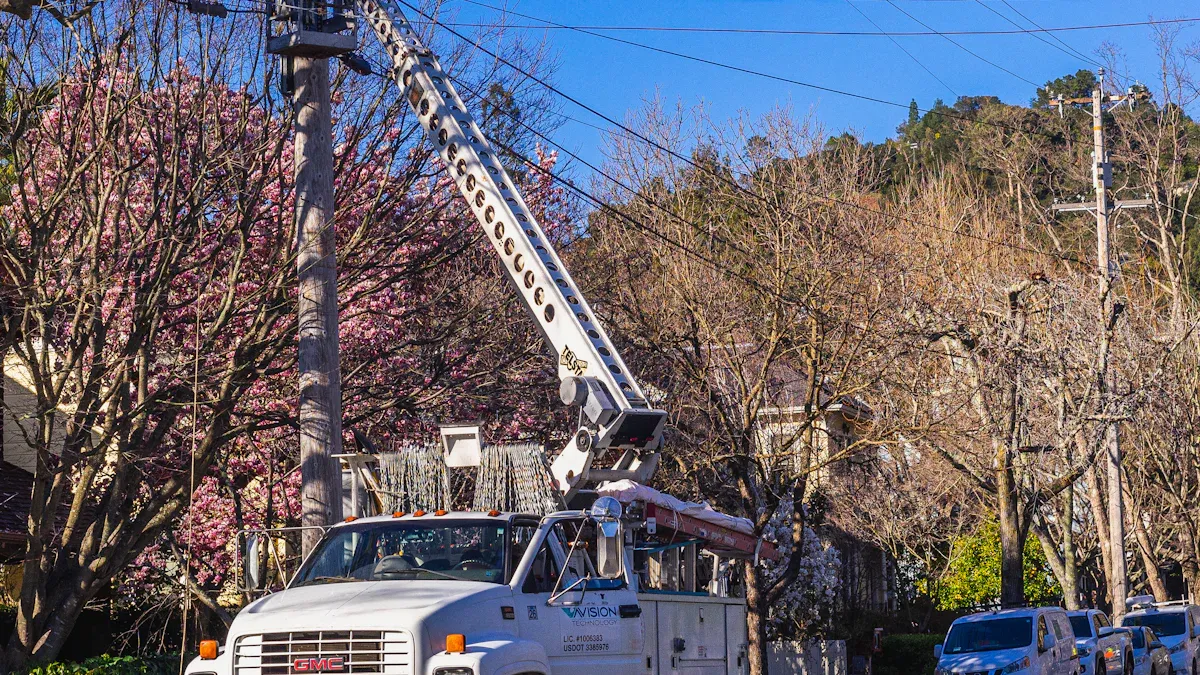
You need to check local rules before you start. Permits help you follow the law and avoid trouble. Go to your local office and ask about zoning and safety codes. You must show your plans for the light pole. Officials will look at your application and tell you what to do next. Always keep your permit papers at the job site. This helps you prove you are following the rules if someone checks. You must follow rules for steel light poles and solar options. These rules keep you and your property safe.
Tip: Permits help your project meet safety and legal rules.
Site Preparation and Safety
Get the site ready before you put in the light pole. Good planning keeps everyone safe and helps the job go well. Check the ground and look for wires or pipes underground. Wear safety gear and put up barriers. The table below lists safety steps and things to check at the site:
Safety Practices | Description |
|---|---|
PPE | Make sure everyone wears helmets, gloves, boots, and vests. |
Fall Protection | Use fall protection when working high up. |
Barriers | Put up barriers and warning signs around the work area. |
Lockout/Tagout | Use lockout/tagout when working on electrical systems. |
First Aid | Keep first aid kits and fire extinguishers nearby. |
Site Assessment Items | What to Check |
|---|---|
Soil Conditions | Look for soft, sandy, rocky, clay, or filled ground. |
Underground Utilities | Ask for markings for power, water, fiber, and gas lines. |
Wind Exposure | Check if the area is open or sheltered from wind. |
Traffic and Access | Make sure cranes can get in and roads are safe. |
Mounting and Base Options
Pick the right way to mount your poles. The job and ground type help you decide. Steel light poles often use anchor base or direct burial. The table below explains both ways:
Mounting Method | Description | Pros and Cons |
|---|---|---|
Anchor Base | The pole is bolted to a concrete base. | Costs more and takes longer, but is easy to replace and strong. |
Direct Burial | The pole goes straight into the ground with no concrete base. | Cheaper and faster, but needs taller poles and does not work in loose soil. |
Solar poles can use these ways too. Anchor base is good for heavy steel poles in busy places. Direct burial works for simple solar poles in parks or gardens. Always pick the mounting that fits your job and follows the rules.
Electrical Connections
You must connect the light pole to power safely. Turn off the power before you start. Get tools like wire nuts, strippers, and a utility knife. Hire a licensed electrician to do the work. Most outdoor light poles need grounding for safety. The National Electrical Code does not require a grounding electrode, but many experts say it is a good idea. Good connections keep your light working and safe. Solar poles need special wires for panels and batteries. Always check your local rules to make sure you follow them.
Turn off power before you start.
Use the right tools for the job.
Hire a licensed electrician.
Ground the pole to keep it safe.
Follow local rules for all wiring.
Alert: Safe wiring keeps your light poles working and your project safe.
Maintenance of Light Poles
Taking care of light poles helps keep your property safe. It also keeps people from getting hurt. Doing regular checks stops accidents and keeps lights working. Simple steps can help your poles last longer.
Inspection Checklist
Check your light poles often to find problems early. Use this table to help you know what to look for:
Inspection Type | Items to Include |
|---|---|
Visual Examination | Look for cracks, rust, peeling paint, leaning poles, loose or broken hardware. |
Physical Inspection | Check the foundation, base, fasteners, and electrical connections. |
Load Testing (if needed) | Test with weights or wind to see if the pole is strong. |
Documentation | Take pictures, write down measurements, and describe any issues. |
Watch for damage or things that look worn out. Write down what you see and take pictures. This helps you remember changes over time.
Cleaning and Preventative Care
Cleaning your light poles helps them look nice and last longer. Try these easy steps:
Clean poles two times each year, especially if it is dusty.
Use mineral spirits to clean powder-coated poles.
Use 600 grit sandpaper or power wash steel or aluminum poles.
Paint over scratches to stop rust from starting.
Repaint steel poles when needed to keep them from rusting.
Check your poles often so you can fix problems early.
Tip: Clean your poles after storms or strong winds to get rid of dirt.
Repairing Damage
If you see damage, fix it quickly to keep your lights safe:
Look at the damage and decide if you need to fix or replace the pole.
Mark the area so people stay away from danger.
Tell the right people about the problem.
Use portable lights if you need light while fixing the pole.
Call a professional to repair the pole.
Upgrading for Energy Efficiency
You can save energy and money by making upgrades:
Change to LED lights. They last longer and use less power.
Add solar panels so your poles make their own power.
Use smart tools like motion sensors or lights that change brightness.
These upgrades help your light poles work better and cost less to use.
Cost and Budgeting for Poles
Purchase Costs
You need to plan for the cost of buying light poles. The price depends on the material you choose. Here is a table that shows the average cost range for different types:
Material | Average Cost Range |
|---|---|
Concrete | $250 - $900 |
Aluminum | $250 - $5,000 |
Composite | $2,500 - $3,500 |
Steel | $200 - $3,000 |
You should decide your budget based on the size of your project and the quality you want. High-quality poles may cost more at first, but they last longer and need less repair.
Installation Expenses
You must also think about the cost to install light poles. Expenses can change if you work on a home or a business property. Here are some common costs:
Expense Type | Cost Range |
|---|---|
Building permits | $140–$3,000 |
Electrical permits | $40–$500 |
Excavation permits | $25–$300 |
Right-of-way access | $60–$300+ |
Dismantling and hauling | $200–$500 per fixture |
Hazardous disposal | $50–$100 per light |
You may also need to pay for site surveys, project management, and surprises that come up during the job.
Maintenance Costs
You will spend money each year to keep your light poles working well. Maintenance includes fixing problems, cleaning, and changing bulbs. LED lights cost about half a cent per day to run, while old bulbs can cost six times more. Regular care helps your poles last longer and keeps your property safe.
Energy Savings
You can save a lot of money by using LED light poles. LED lights use up to 90% less energy than old types. This means you pay less for electricity every month. LED lights also last longer, so you do not need to replace them as often. Over time, these savings can add up to thousands of dollars. You can also look for rebates or grants to help with the cost of new poles.
Tip: Break your project into steps. Plan for buying, installing, and caring for your light poles. This helps you control costs and avoid surprises.
You make good choices when picking light poles. First, check the local rules and get permits. Always follow building codes before you start. Talk to utility companies before you put in a light pole. Pick aluminum, steel, or commercial poles for your needs. Use led outdoor lighting for big spaces. Hire licensed contractors to install poles safely. Inspect your poles often and upgrade to led lights. Clean your light poles and fix any damage fast. Led and aluminum poles help you save energy and money. Ask local experts for advice before you begin your project.
Remember: Checking your poles and upgrading to led helps them last longer and keeps your property safe.
Get permits for each light pole.
Follow building codes for every pole.
Check zoning rules before installing.
Contact utility companies first.
Hire licensed contractors for installation.
Inspect your light poles often.
FAQ
How do you choose the right pole height for your property?
You measure the area you want to light. You check if tall poles cover large spaces. Short poles work best for small areas. You match the pole height to your lighting needs.
What permits do you need before installing a pole?
You visit your local zoning office. You ask about building permits for each pole. You get electrical permits if you connect the pole to power. You keep all permit papers at your job site.
How often should you inspect each pole?
You inspect every pole two times each year. You look for rust, cracks, or leaning poles. You check the base and electrical connections. You write down what you find for each pole.
Can you use LED lights with any pole?
You can use LED lights with most pole types. You check the fixture size and wiring. You make sure the pole supports the weight of the LED fixture. You follow local codes for every pole.
What steps help you maintain a pole for longer life?
You clean each pole two times a year. You repaint steel poles when you see scratches. You fix damage quickly. You upgrade to LED lights. You keep records for every pole you maintain.
See Also
Guide to Installing Light Poles for Optimal Performance
Essential Tips for Safe and Durable Street Light Installation
Expert Strategies for Installing Flood Lighting in Any Property
Evaluating Lighting Poles: Finding the Best Value for Projects
Selecting Ideal LED Street Light Poles: Key Factors to Consider
