Everything You Need to Know About High Bay Lights Installation

When you start high bay lights installation, you must think about safety and how well the lights work. Good installation keeps your area safe. It also helps your lights last longer. If you do not follow the best steps, many safety problems can happen:
Bad wiring or loose wires can make things too hot and cause fire.
Too many lights on one circuit can make them flicker and not last long.
Water and wet air can make electrical dangers.
Bumps or shaking can make parts loose and show wires.
You must always turn off the power first. Use tools that are covered with rubber. Follow the rules in your area. High bay fixtures can be used in many places. They are not just for factories. You can use them at Home or in Product storage. Always check if your Led Light and high bay setup follow About Us and safety rules.
Key Takeaways
Always turn off the power before you start. Use safe tools to stop accidents and fires. Pick the right type and brightness of high bay lights. Think about your ceiling height and space size. This helps you get bright and even lighting. Plan where to put each fixture with care. This stops dark spots and glare. Use the right space between lights and the best beam angles. Use good mounting methods and secure the wiring well. This keeps the lights steady and safe. Clean and check your high bay lights often. This keeps them bright and helps you find problems early. It also makes the lights last longer.
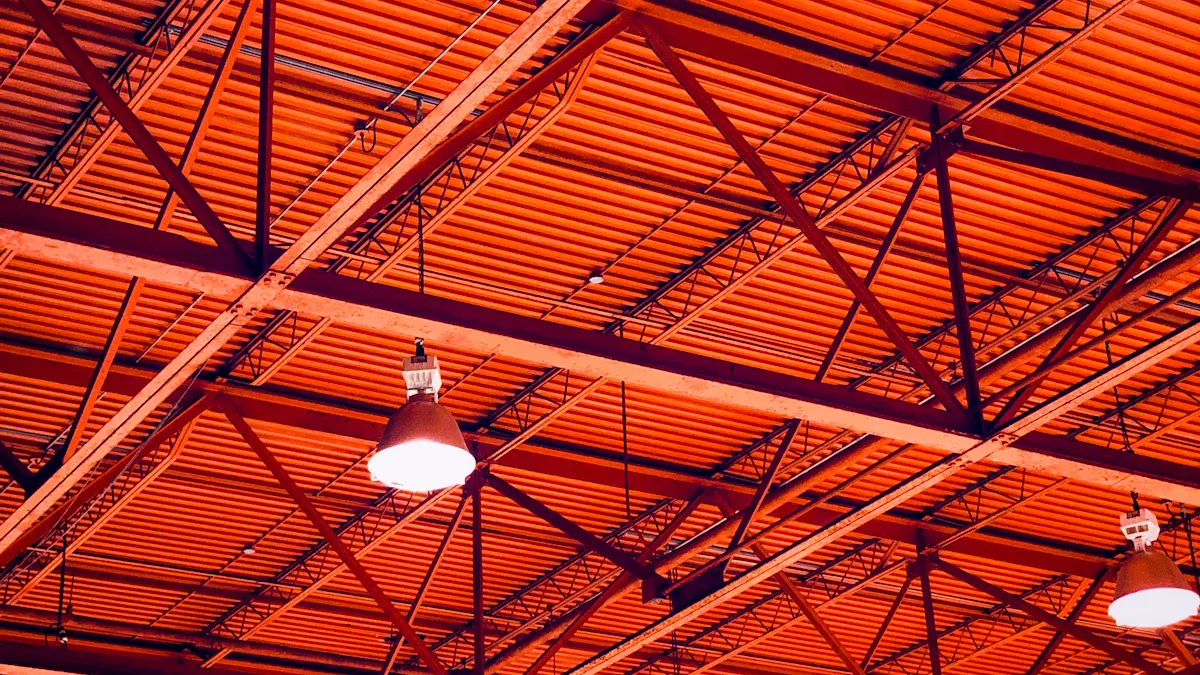
Applications of High Bay Lights
Common Spaces
You will find high bay lights in many large spaces. These lights work best in places with high ceilings, usually 20 feet or more. You often see high bay lighting in:
Automotive repair facilities
Warehouses
Manufacturing plants
Fitness centers
Indoor sports arenas
Large retail stores
Storage facilities
Factories
Airport hangars
Large indoor stadiums
Gas stations
These spaces need strong and even light. High bay lighting helps you see clearly in every corner. You can use high bay lights in commercial and industrial applications, such as warehouses, factories, and event centers. Many schools, hospitals, and parking garages also use high bay light applications to keep areas bright and safe.
Tip: High bay lighting is perfect for spaces with ceilings from 10 feet up to over 40 feet. The larger the space, the more important it is to choose the right high bay lights.
Here is a quick guide to ceiling heights and the light you need:
Ceiling Height (feet) | Recommended Lumen Output | Suggested Fixture Spacing (feet) |
|---|---|---|
10-15 | 10,000-15,000 lumens | 10-14 |
15-20 | 16,000-20,000 lumens | 12-14 |
25-35 | 33,000-35,000 lumens | 20 |
40+ | Over 45,000 lumens | 20-25 |
Benefits
High bay lighting gives you many advantages in commercial and industrial applications. You get bright, uniform light that covers large areas. High bay lights, especially LED types, use less energy than older lights. This saves you money on electricity. These lights last a long time, so you do not need to replace them often. You also get less glare and better visibility, which keeps your space safer.
High bay lights are energy efficient.
They provide strong, even light for big spaces.
You save money because they last longer.
Many high bay lights have features like dimming and motion sensors.
They work well in tough environments.
You can trust high bay lighting for all your large space needs. The many applications of high bay lights make them a smart choice for any big area.
Types of High Bay Lights
When you look at high bay lighting, you will find several types that fit different spaces and needs. Understanding the types of high bay lights helps you choose the best option for your building. Each type uses different designs and technology to provide the right light for your space.
High Bay LED Lights
High bay LED lights use advanced LED technology to give you bright, efficient light. You can save up to 75% on energy costs when you switch from traditional fixtures to LED high bay lights. These industrial LED lights turn more energy into light and waste less as heat. You often recover your investment in about two years because of lower energy bills and less maintenance. High bay LED lights last much longer than older types. Many models work for 50,000 to 100,000 hours, which means you do not need to replace them often. This long life makes them perfect for hard-to-reach places.
Note: High bay LED lights also improve safety. You spend less time changing bulbs at high heights.
You can find different types of high bay lighting in this category, such as UFO high bay lights. These round, compact fixtures work well in factories, warehouses, and sports arenas. They provide even light across large areas.
Linear High Bay Lights
Linear high bay lights have a long, rectangular shape. You often see these types in warehouses, gyms, and retail stores. They use LED technology to give you bright, even light along aisles and rows. Linear high bay lighting reduces shadows and helps you see clearly in every part of your space. These industrial LED lights are great for spaces with shelves or assembly lines. You can mount them in rows for wide, uniform coverage.
Aspect | Linear High Bay Lights | Round High Bay Lights |
|---|---|---|
Shape | Rectangular | Round (UFO) |
Best Use | Aisles, rows, shelves | Open spaces |
Light Spread | Focused, even | Wide, uniform |
Traditional Fixtures
Traditional high bay fixtures include metal halide, high-pressure sodium, and fluorescent lights. These types of high bay lighting use older technology. They do not last as long as LED high bay lights. Most traditional fixtures work for only 10,000 to 20,000 hours. They also waste more energy as heat, which means higher electricity bills. Many businesses now replace these with industrial LED lights to save money and improve performance.
Tip: If you still use traditional high bay lights, consider upgrading to LED technology for better energy savings and longer life.
High Bay Lighting Design
Fixture Placement
You need to plan fixture placement carefully when you install high bay fixtures and fittings. Good placement helps you get even light and reduces shadows in your space. Start by measuring your area and deciding how many lumens you need for your high bay lighting. The right number of lumens depends on your ceiling height and the size of your space.
Proper spacing between each high bay fixture is important. If you place them too close, you waste energy. If you space them too far apart, you get dark spots. Use this table to help you decide the best spacing for your high bay applications:
Ceiling Height | Spacing for General Lighting | Spacing for Bright Lighting |
|---|---|---|
15-20 ft | 12-15 ft | 10-12 ft |
20-30 ft | 15-20 ft | 12-15 ft |
30-40 ft | 20-25 ft | 15-20 ft |
You can also see the recommended spacing in this chart:
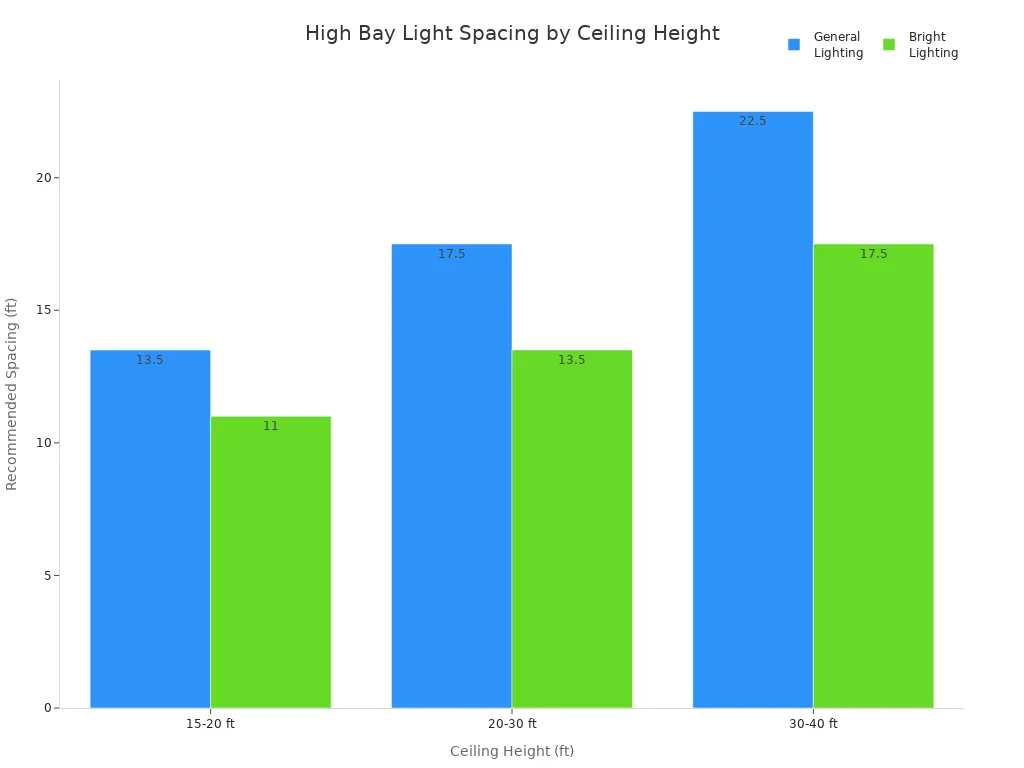
When you use the right spacing, you get uniform high bay lighting. This helps you avoid glare and shadows. You also improve safety and comfort in your building. In large spaces, you should always check the uniformity of your high bay lighting. A good layout gives you a better uniformity ratio and meets lighting standards for many applications.
Light Distribution
You must choose the right light distribution for your high bay fixtures and fittings. The beam angle and distribution type affect how light spreads in your space. High bay lighting often uses beam angles like 60°, 90°, or 120°. Narrow beam angles focus light on the floor. These work well for tasks that need high lumen output in a small area. Wide beam angles cover more space and give even light in large open areas.
Here is a table to help you understand different light distribution types and their best applications:
Light Distribution Type | Beam Shape & Spread | Ideal Applications |
|---|---|---|
Type I | Narrow oval, ~15° | Pathways, walkways |
Type II | Wider, ~25° | Tennis courts, small fields |
Type III | Balanced, ~40° | Parking lots, large open areas |
Type IV | Forward throw | Arenas, sports facilities |
Type V (Standard) | 360° circular | Large open areas, rotundas |
Type V (Square) | 360° square | Parking lots, commercial spaces |
Type V Short (5S) | Compact circular | Confined areas |
You should match the beam angle and distribution to your ceiling height and the lumen needs of your high bay applications. This helps you get the best results from your high bay lighting. When you plan your high bay layout, always think about how the light will spread and how many lumens you need for each area. This way, you make sure every part of your space gets enough light for its purpose.
Choosing High Bay Lights
Wattage and Lumens
When you choose high bay lights, you need to match the lumen output to your ceiling height and the size of your space. Start by finding the area of your room in square feet. Multiply this by the recommended lumens per square foot for your type of space. For example, a warehouse or gym needs more lumens than a living room. If your ceiling is higher than 10 feet, add about 5% more lumens for each extra foot. This helps you get the best high bay lighting for your needs. For ceilings up to 20 feet, you may need 10,000 to 18,000 lumens per fixture. For 20 to 30 feet, look for 18,000 to 28,000 lumens. Above 30 feet, you may need 24,000 to 50,000 lumens. High bay LED lights with high lumen output work well in large, tall spaces. Using a lumen calculator can help you find the right number for your space.
Mounting Options
You can install high bay lighting in several ways. The most common types include yoke mount brackets, suspension hook mounts, V-hooks, surface mounts, and rod and plate mounts. Each type works best in different environments. For example, yoke mount brackets let you adjust the angle, which is good for sloped roofs. Suspension hook mounts are flexible and easy to install in many spaces. V-hooks give you a secure hold and prevent the fixture from falling. Surface mounts keep the light close to the ceiling, which is great when you need more headroom. Rod and plate mounts hide the wires and look neat. Choose the mounting option that fits your building and makes your high bay lights safe and effective.
Mounting Option | Best Use Case | Key Advantage |
|---|---|---|
Yoke Mount Bracket | Sloped or low roofs | Adjustable angle |
Suspension Hook | Most commercial and industrial spaces | Flexible and easy to install |
V-Hooks | Warehouses, gyms, secure installations | Prevents accidental falls |
Surface Mount | Low ceilings, areas needing more clearance | Maximizes vertical space |
Rod and Plate Mount | Stylish spaces, neat wiring | Conceals wiring, sleek appearance |
Environmental Factors
You must think about the environment where you install your high bay LED lights. Temperature, humidity, and dust can affect how your lights work. Choose LED high bay lights with strong, sealed designs if your space has high humidity or dust. Look for high IP ratings like IP65 or IP66 for dustproof and water-resistant performance. Aluminum housings help with heat dissipation and make your lights last longer. If your facility gets very hot or cold, pick lights that can handle those temperatures. Always check for certifications like UL, DLC, or ENERGY STAR to make sure your lights meet safety and energy efficiency standards. Using energy efficient lighting with advanced controls, such as motion sensors and dimming, can boost energy efficiency and cost savings. These features help you save money and keep your high bay lighting working well for years.
Tip: Regular cleaning and inspection keep your high bay lights bright and extend their lifespan. Choose the best high bay lighting for your space by considering all these factors.
Installation Guide

Installing high bay lights requires careful planning and attention to detail. You need to follow a step-by-step installation guide to ensure safety and get the best lighting results. This section will help you understand the installation process, from preparation to final testing. You will learn about the types of installation, safety precautions during installation, and installation best practices.
Preparation and Safety
Before you start, you must prepare your workspace and gather all necessary tools. Safety comes first in every high bay installation. Here are important steps to follow:
Turn off the power supply at the main circuit breaker. Always use a voltage tester to make sure no electricity is present.
Wear personal protective equipment (PPE) such as gloves, goggles, and sturdy shoes.
Use a stable ladder or lift. Make sure the area below is clear to prevent accidents.
Inspect all tools for damage. Only use tools in good condition.
Gather all required tools and materials. You will need a ladder, wire strippers, screwdrivers, pliers, a voltage tester, and mounting hardware.
Mark the installation area and notify others to avoid accidental power restoration.
Check the ceiling or support beam. It must support the weight of the high bay fixture.
Review the manufacturer’s instructions for your specific high bay lights.
Tip: If you feel unsure about electrical work, consider hiring a professional electrician. This reduces the risk of mistakes and keeps you safe.
You should also conduct a site survey. Assess the environment, lighting needs, and power supply. Choose high bay lights that meet your requirements and have proper certifications. Always follow local building codes and safety regulations.
Mounting Fixtures
You can use different types of installation for high bay fixtures, such as hook, chain, bracket, or NPT (pipe) mounting. The right method depends on your ceiling type and the fixture design. Follow these steps for secure mounting:
Preparation:
Confirm the power is off.
Check that the ceiling or beam can handle the fixture’s weight.
Select the correct mounting method for your space.
Hook Mounting:
Install a hook rated for at least four times the fixture’s weight.
Attach the fixture’s ring to the hook.
Make sure the fixture hangs securely.
Chain Mounting:
Attach chains to the fixture using clips or hooks.
Hang the chains from a support beam or crossbar.
Adjust the chain length for the right height.
Bracket Mounting:
Drill holes in the ceiling or beam.
Insert expansion screws or anchors.
Attach the mounting bracket and tighten the screws.
Ensure the bracket is level and secure.
NPT (Pipe) Mounting:
Attach the bracket to the fixture.
Unscrew the NPT nut.
Connect the steel pipe to the bracket and tighten the nut.
Final Checks:
Confirm all connections are tight.
Make sure the fixture is stable and level.
Common Mistake Alert: Loose electrical connections can cause flickering, short circuits, or fire hazards. Always secure and insulate all connections. Avoid daisy-chaining too many fixtures on one circuit to prevent overload.
Wiring and Testing
Proper wiring is a key part of the installation process. You must follow these steps to ensure safe and code-compliant connections:
Turn off the power before starting any wiring work.
Use a voltage tester to confirm the power is off.
Strip the insulation from the ends of the wires using wire strippers.
Match and connect the wires from the high bay light to the power supply:
Black (live)
White (neutral)
Green or bare (ground)
Twist the matching wires together and secure them with wire connectors.
Wrap electrical tape around the connectors for extra safety.
Place the connected wires inside an electrical box or conduit to protect them.
Organize wires neatly with cable ties or electrical tape.
After wiring, you need to test the high bay lights:
Restore power at the main circuit breaker.
Switch on each fixture to check if it works.
Look for any flickering or dim spots.
Adjust the height and angle of the fixtures if needed.
Check the brightness and make sure the light spreads evenly.
Note: If you notice any problems, turn off the power and check all connections again. Never leave exposed wires or loose fittings.
By following these installation best practices, you can avoid common mistakes and ensure your high bay lighting system works safely and efficiently. Always remember the safety precautions during installation and consult a professional if you have any doubts.
Maintenance Tips
Cleaning and Inspection
You should keep your high bay lights clean and check them often. This helps them shine bright and use less energy. Dust and dirt can block the light and make your space dim. Always turn off your high bay lights and let them cool before cleaning. This keeps you safe from burns or shocks. Use a soft duster or a vacuum with a gentle brush to remove dust from each high bay fixture. Clean the lenses and covers so more light reaches the floor. If you see any cracked covers or parts that look burned, replace them right away. Cleaning often stops dust from piling up and keeps your high bay lighting bright. Make a schedule to check your lights. Look for loose wires, broken connectors, or signs of too much heat. Make sure all high bay fixtures are tight and not moving. Change bad wires or connectors as soon as you find them. Try to keep the area around your high bay lights cool. This helps them last longer and stay bright.
Tip: Getting a professional to check your lights can help you find hidden problems. This keeps your high bay lighting system safe and working well.
Troubleshooting
If your high bay lights do not work right, you can fix many problems with easy checks. If you see flickering or dimming, look for loose wires or a bad LED driver. Flickering usually means a loose wire or a power problem. Dim lights can happen if dust covers the lens or if old bulbs lose their brightness. If a high bay light will not turn on, check the wires and test the power. Sometimes, too much heat makes the driver stop working. Make sure air can move around each high bay fixture. Too much heat can waste energy and make the lights dimmer.
Here is a simple troubleshooting checklist:
Problem | What to Check | Solution |
|---|---|---|
Flickering | Loose wiring, bad driver | Tighten wires, replace driver |
Dim lighting | Dust, old bulbs, low lumen output | Clean, replace bulbs |
Not turning on | Wiring, power supply, driver | Repair wiring, replace driver |
Overheating | Ventilation, fixture placement | Improve airflow, reposition |
Color shifting | Faulty LED chips or drivers | Replace chips or drivers |
If you cannot fix the problem, call a lighting expert or electrician. Keeping extra drivers and bulbs nearby helps you fix things fast. This keeps your high bay lighting system working. Checking your lights often and fixing problems quickly saves energy and makes sure your space stays bright.
You get the best results when you plan where to put each fixture. Use the right mounting method for your high bay lights. Test every light after you install it. Pick the high bay that fits your space. Clean and check your lights often. Getting help from a professional makes things safer. Regular care helps your fixtures last longer. Always follow safety rules. Ask an expert if you are not sure what to do. Keep checking and fixing your lights. This keeps your lighting bright and your space safe.
FAQ
How high should I install high bay lights?
You should install high bay lights at least 15 feet above the floor. For best results, place them between 20 and 40 feet high. This height gives you even light and reduces shadows.
Can I install high bay lights by myself?
You can install high bay lights if you know basic electrical work. Always turn off the power first. If you feel unsure, hire a licensed electrician. Safety comes first.
How often should I clean high bay lights?
You should clean your high bay lights every three to six months. Dust and dirt can block light and lower brightness. Use a soft cloth or duster for best results.
What should I do if my high bay light flickers?
Flickering often means a loose wire or a bad driver. Check all connections and tighten them. If the problem continues, replace the driver or call an electrician.
See Also
Comprehensive Overview Of High Bay Lighting Applications And Installation
Detailed Instructions For Installing High Bay LED Lighting Systems
Industrial LED High Bay Lights: Uses, Advantages, And Setup Tips
Choosing LED High Bay Lights: Benefits, Uses, And Key Factors
Converting To LED Technology For High Bay Lighting Solutions
