What to Consider Before Installing LED Street Lights in 2025

When you want to install LED street lights in 2025, you should consider the Key Features such as energy efficiency, safety improvements, smart technology, and long-term cost savings. These aspects help you use less energy, enhance street safety, and reduce expenses on maintenance. The table below illustrates how each feature affects the performance, safety, energy efficiency, and overall value of the lights. For more information about any specific Product, you can visit the Home or About Us page to learn more about our Led Light offerings.
Feature | Impact on Performance, Safety, Energy Efficiency, and Long-term Costs |
|---|---|
Energy Efficiency | Uses less energy and saves money on bills. |
Safety Improvements | Makes it easier to see for people and drivers, so there are fewer accidents. |
Integration with Smart Tech | Lets you control city lights in a smart way. |
Long-term Cost Benefits | You do not need to fix or change lights as often because they last longer. |
Key Takeaways
Pay attention to energy efficiency to lower bills and help the environment. - Pick the right lumen output and color temperature for better safety and clearer streets. - Place poles in the right spots and space them well to spread light evenly and avoid dark areas. - Think about using smart controls for dimming and setting schedules to save energy and adjust to different needs. - Look at both the starting costs and future savings to make a smart choice when buying LED street lights.
Key Features for LED Street Lights
When you start a LED street lighting project, you should look at some important features. These features help you pick the right lights for your area. They also help keep people safe, save energy, and lower costs.
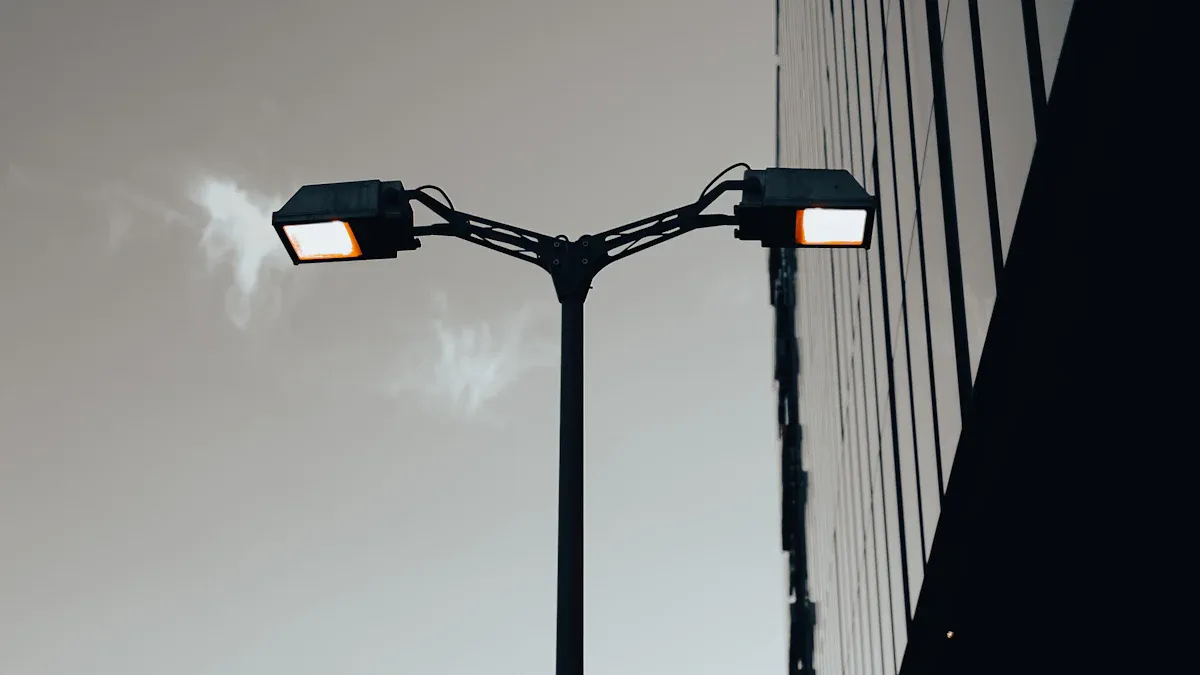
Lumen Output
Lumen output shows how bright a street light is. Brighter lights help drivers and people see better. This can stop accidents and make roads safer. You need to pick the right brightness for each place. Busy areas and parking lots need more light than quiet streets.
Tip: The right lumen output stops dark spots and keeps people safe at night.
Area Type | Minimum Horizontal Illuminance (lx) | Minimum Vertical Illuminance (lx) |
|---|---|---|
Parking Lots (general) | 2 | 1 |
Enhanced Security | 5 | 2.5 |
Common Businesses | 60 | 50 |
Ground Level Surrounding | 30 | N/A |
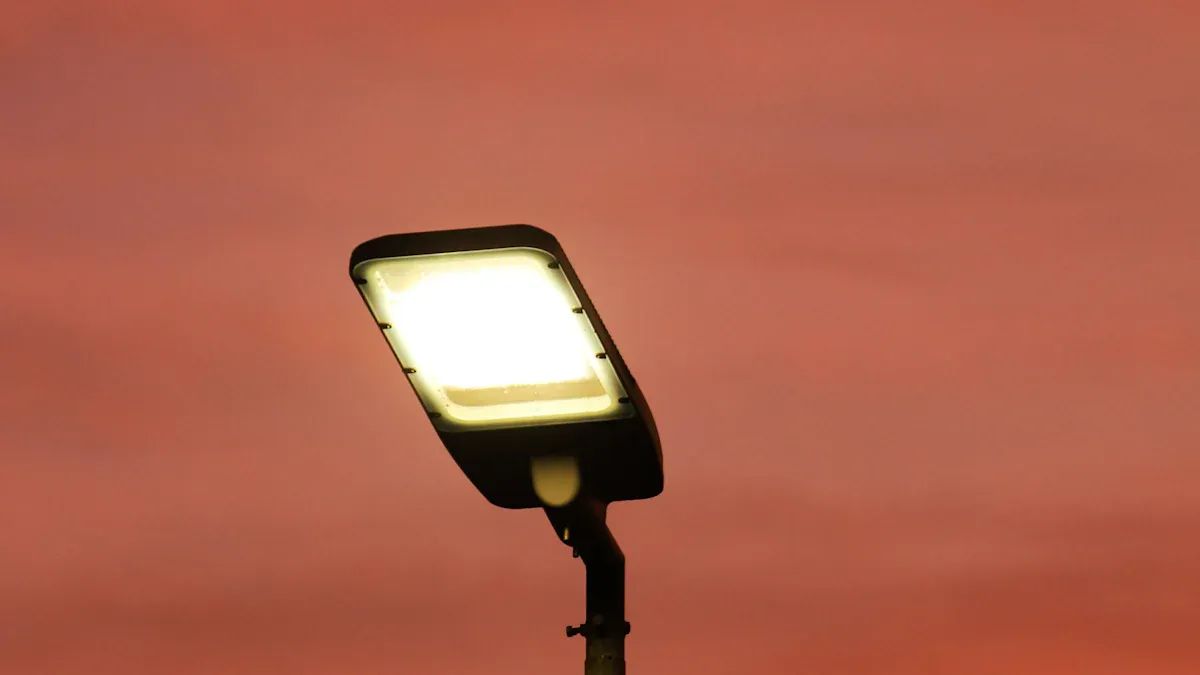
Color Temperature
Color temperature changes how people feel and see under the lights. Warm lights (about 3000K) make people feel safe and cut down on glare. Cool lights (up to 5000K) are good for busy roads and highways. Studies say people feel safer with warm white light, especially when it is bright.
3000K: Good for homes and makes less light pollution.
4000K: Works for neighborhood roads and balances glare and visibility.
5000K: Best for highways and big roads.
Light Distribution
Light distribution shows how the light spreads on the ground. You want the light to cover the area evenly. This stops dark spots and sharp shadows. Wide light works for big open spaces. Narrow beams are better for small or tight places. Good light distribution helps everyone see and keeps accidents down.
Note: Even lighting makes streets safer and more comfortable for all.
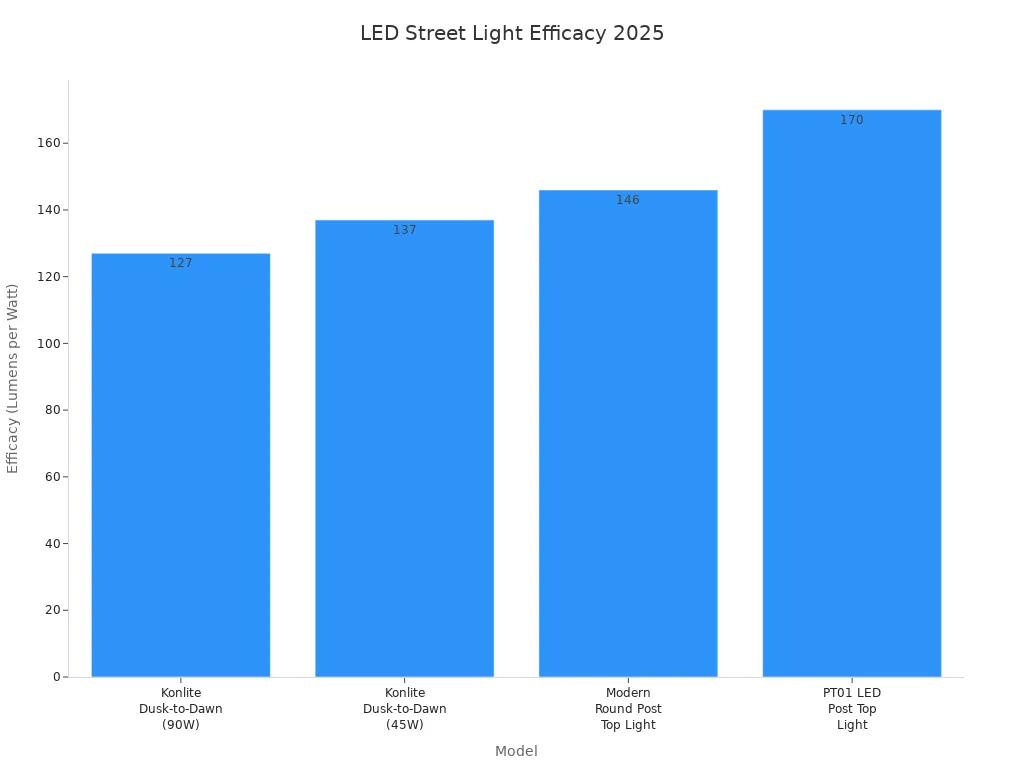
Energy Efficiency
Energy efficiency is a very important feature. Efficient LED street lights use less power and save money over time. Some models can give up to 170 lumens per watt. This means you get more light for every watt you use.
Model | Application | Lumens | Wattage | Color Temp (CCT) | Efficacy (LPW) |
|---|---|---|---|---|---|
Konlite Dusk-to-Dawn (90W) | Perimeter Security, Large Parking Areas | 11,500 | 90W | 5000K | 127 |
Konlite Dusk-to-Dawn (45W) | Residential Driveways, Walkways, Small Lots | 6,200 | 45W | 5000K | 137 |
Modern Round Post Top Light | Architectural Areas, Commercial Properties | 10,500 | 75W/56W/36W/22W | 3000K-5000K | 146 |
PT01 LED Post Top Light | Parks, Walkways, Historic Districts | 24,400 | 70W/100W/150W | 3000K-5000K | 170 |
Efficient lights last longer and cost less to fix. They also help the city use less energy and lower pollution.
If you focus on these key features, you will make good choices for your LED street lighting project. You will make streets safer, save money, and help the planet.
Pole Placement
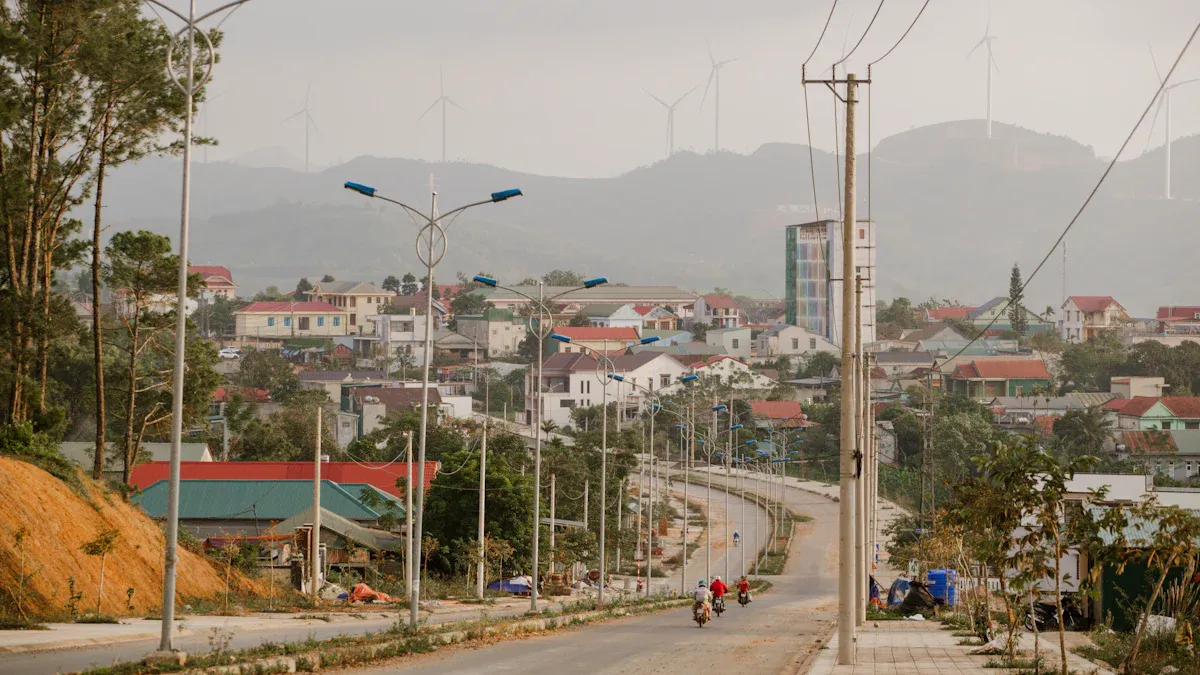
Proper pole placement helps you get the best results from your LED street lights. When you set the poles at the right height and distance, you make sure the light covers the road evenly. This keeps streets safe and bright, with fewer dark spots.
Spacing and Height
You need to choose the right pole height and spacing for each road type. Taller poles work well for wide roads and highways. Shorter poles fit better in neighborhoods. The space between poles also matters. If you place them too far apart, you get dark areas. If you put them too close, you waste energy and money.
Here is a quick guide to help you decide:
Road Type | Recommended Pole Spacing | |
|---|---|---|
Residential | 15-30 feet | 2.5 to 3 times the height |
City Street / Highway | 30-50 feet | 75 to 90 feet for 30-foot poles |
Streets over 65 feet wide | 25-50 feet | Symmetrical arrangement |
Streets 51-65 feet wide | 25-50 feet | Intertwined arrangement |
Streets 50 feet wide or less | 15-30 feet | One side arrangement |
Tip: Use taller poles and wider spacing for highways. For small streets, shorter poles and closer spacing work best.
Distribution and Coverage
Pole placement affects how well the light spreads across the road. You want to avoid dark spots and make sure every part of the street gets enough light. The distance from the pole to the road, the length of the arm, and the angle of the light all play a role.
Factor | Description | Recommendation | Importance |
|---|---|---|---|
Pole Distance from Roadway | How far the pole sits from the road edge | 1.5 to 3 meters | Keeps poles safe from traffic and lights the road well |
Arm Length | How far the light fixture extends | 1 to 3 meters | Longer arms help light reach wider roads |
Overhang | How much the light fixture extends past the arm | Align with road’s centerline | Reduces dark spots in the middle of the road |
Arm Tilt Angle | The angle of the light fixture | 0° to 15° tilt | Low tilt cuts glare and spreads light evenly |
Pole-to-Pole Distance | Space between each pole | Urban: 30-50m, Highways: 50-100m | Even spacing gives steady light everywhere |
Good pole placement means safer streets, less wasted energy, and better visibility for everyone.
Power Accessibility
Grid vs. Solar Options
You have to pick between grid power and solar energy. Each one has good points and bad points. Solar street lights do not need wires to work. They get energy from the sun and store it. This means they still work if the power goes out.
Solar streetlights work on their own. They use sunlight for power. They keep the streets bright even when there is no electricity.
The table below lists the main pros and cons for each type:
Type | Advantages | Disadvantages |
|---|---|---|
Solar LED Street Lights | - Energy independence | - Higher upfront costs |
Grid-Powered LED Lights | - Reliability and consistent performance | - Higher operational expenses |
Solar-powered lights are better for the earth. They do not make pollution or radiation. Grid-powered lights cost less at first and work well in cities. But they can stop working in storms or blackouts, which can make streets unsafe.
Power Source Planning
You should pick your power source based on where you live. If you do not have easy grid access, solar lights are a good choice. They do not need wires or steady power. You can use smart technology to check and control your lights. This makes your system work better and saves energy.
Smart street lights can use up to 80% less energy.
Using less energy means less pollution and helps the planet.
Smart controls also help you save money over time.
Factor | Description |
|---|---|
Renewable Energy Sources | Use solar or other renewables if grid power is hard to get. |
Smart Technologies | Add smart controls to watch and manage your lights. |
Energy Efficiency | Pick efficient lights to save money and help the earth. |
Always choose a power plan that fits your area. This helps your LED street lights work well and saves you money.
Obstructions and Site Assessment
Trees and Buildings
You need to look at trees and buildings before you install LED street lights. These objects can block light and create dark spots on the road. When you plan your lighting project, you should check for tall trees, large branches, and nearby buildings that might cast shadows. You want to make sure the light reaches every part of the street.
Trees can grow and block light over time. You should think about future growth when you choose where to put your lights.
Buildings can reflect or absorb light. They may cause glare or make some areas too dark.
Wildlife can be affected by the color and intensity of LED lights. Blue light from LEDs can disturb animals at night. You can use spectral manipulation to avoid harming local species.
You can use these strategies to reduce problems from obstructions:
Use shielding to keep light focused on the road and prevent overspill.
Try part-night lighting, which means turning off lamps when they are not needed.
Minimize the number of street lights in areas with many trees or buildings.
Offset lights so they do not shine directly into homes or sensitive habitats.
Use dimming to lower brightness in quiet areas.
Tip: Always check for trees and buildings before you install new lights. This helps you avoid wasted energy and keeps streets safe.
Ensuring Unobstructed Light
You want every street to have clear, even light. A good site assessment helps you find and fix problems before you install anything. Start by walking through the area and looking for things that block light, like trees, buildings, or uneven ground.
Identify all obstructions, including trees, buildings, and hills.
Evaluate how these barriers affect light coverage.
Adjust pole heights to make sure light reaches every part of the street.
Consideration | Description |
|---|---|
Identification of Obstructions | Find trees, buildings, or other barriers that block light. |
Environmental Analysis | Check terrain and weather to see how they affect light spread. |
Strategic Placement | Place lights to reduce light pollution and cover the area well. |
You should also look at traffic flow. Busy roads may need taller poles for better visibility. Environmental factors like weather and sunlight can change how well your lights and solar panels work.
Conduct a full site assessment before installation.
Analyze traffic patterns to pick the right pole height.
Think about weather and terrain to get the best results.
🌳 Careful planning helps you avoid dark spots and keeps your streets safe for everyone.
Weather Resistance
When you choose LED street lights, you need to make sure they can handle all types of weather. Rain, snow, and dust can damage lights that do not have strong protection. Weather resistance helps your lights last longer and work better, even in tough conditions.
IP Rating
The IP rating tells you how well a light fixture keeps out water and dust. You should always check this rating before you buy or install any LED street light. Different areas need different levels of protection. For example, a light in a dry place does not need as much protection as one near a fountain or in a rainy city.
Here is a quick guide to common IP ratings for LED street lights:
IP Rating | Description |
|---|---|
IP44 | Protection against splashes of water from any direction |
IP65 | Protection against low-pressure water jets from any direction, suitable for areas with frequent rain |
IP67 | Waterproof, can handle temporary immersion in water, ideal for areas near swimming pools or fountains |
Tip: For most city streets, you should look for at least IP65. This keeps your lights safe during storms and heavy rain.
Durability
Durability means your LED street lights can stand up to extreme weather. You want lights that keep working in both hot summers and freezing winters. LED street lights often last longer than old-style lights because they have better protection.
You can see how LED street lights compare to traditional lights in the table below:
Feature | Description |
|---|---|
Waterproof Ratings | LED street lights have IP65 to IP67 ratings, so they can handle heavy rain and snow. |
Thermal Management | They use heat sinks and cooling systems to protect against high temperatures. |
Cold Weather Features | Many models have cold start abilities and anti-freeze materials to prevent failures in freezing conditions. |
You should always pick lights with strong waterproof ratings and good cooling systems. These features help your lights last longer and save you money on repairs. If you live in a place with harsh winters or hot summers, look for models with special cold or heat protection.
Weather-resistant LED street lights give you peace of mind. You know your streets will stay bright and safe, no matter the weather.
Smart Controls
Smart controls help your LED street lights work better. They let you save energy and make streets safer. You can also change the lights to fit what is happening right now. In 2025, there are many smart control choices for your lighting system.
Dimming and Scheduling
Dimming and scheduling let you set how bright the lights are. You can also pick when they turn on or off. You can make a schedule that matches busy times or special events. This way, you only use the light you need.
Cities that use LED street lights save about half on energy.
Adding smart dimming and scheduling saves up to 30% more.
You can make different dimming plans for times or weather.
The lights can change for things like traffic or storms.
These tools help you use less energy and keep streets safe.
Tip: Dimming and scheduling help you save money and make your lights easy to control.
Here are some smart features you can use:
Smart Feature | Description | Benefits |
|---|---|---|
Motion Sensors | Sense movement and change the lights as needed | Save energy by dimming lights when no one is there |
Remote Controls | Let you change settings from far away | Change lights fast for new street needs |
IoT Integration | Connects lights to a network for real-time data | Use less energy by matching light to demand |
Adaptive Lighting
Adaptive lighting is a step above other smart controls. The lights can get brighter or dimmer using real-time data. They use sensors and software to react to cars, people, or the weather.
Adaptive lighting uses sensors to find cars, bikes, or people.
The lights get brighter when there is activity and dim when it is quiet.
This helps people see better and stops accidents.
You save energy because the lights are only bright when needed.
Adaptive lighting keeps streets safe and saves energy in every situation. 🌃
Surge Protection
Reliability
You want your LED street lights to work every night, even when the weather gets rough or the power grid acts up. Surge protection plays a big role in keeping your lights reliable. Electrical surges can happen because of lightning, power outages, or sudden changes in voltage. These surges can damage your lights and make them stop working early.
Surge Protection Devices (SPDs) act like shields for your LED lights. They absorb extra voltage and send it away safely. This keeps the LED drivers and chips working in a safe range. When you use SPDs, you help your lights last longer and avoid costly repairs.
Tip: Adding surge protection reduces maintenance and replacement costs. You spend less time fixing broken lights.
You can choose from different types of SPDs. Each type protects your lights in a special way:
Type 1 SPD: You install this at the power entrance. It protects against direct lightning strikes.
Type 2 SPD: You place this inside the LED fixture or panel. It guards against surges from inside the building or system.
Type 3 SPD: You use this inside the LED driver. It gives extra protection right where the voltage enters the light.
SPD Type | Where to Install | What It Protects Against |
|---|---|---|
Type 1 | Power entrance | Lightning strikes |
Type 2 | Fixture or panel | Internal power surges |
Type 3 | LED driver | Local voltage spikes |
SPDs help your LED street lights stay bright and safe. They shield the circuits from unpredictable voltage spikes. You get stable performance, even in areas with lots of storms or electrical problems.
SPDs prolong the lifespan of your lights.
They keep your lighting system working smoothly.
You avoid sudden outages and keep your streets safe.
If you want reliable LED street lights in 2025, surge protection is a must-have. 🌩️
Mounting Options
Pole and Wall Mounts
You have several ways to mount LED street lights. Each option changes how you install and maintain your lights. Direct mounts let you attach lights straight to fixed poles. This method works well for most city streets. Slip fit mounts give you more flexibility. You can adjust the angle of the light, which helps you aim the beam where you need it. This feature also makes it easier to reach the light for repairs.
Yoke mounts attach to walls. You often see these on buildings or parking garages. They need an external junction box, which can make installation more complex. Flood mounts look nice and are simple to install. However, you cannot change their angle, so they may not work for every location.
Mount Type | Where to Use | Angle Adjustment | Installation Complexity | Maintenance Ease |
|---|---|---|---|---|
Direct Mount | Fixed poles | No | Easy | Good |
Slip Fit Mount | Poles | Yes | Moderate | Very Good |
Yoke Mount | Walls | Yes | Complex | Moderate |
Flood Mount | Poles, walls | No | Easy | Limited |
Tip: Choose a mounting option that matches your site and makes future maintenance simple.
Maintenance Access
You want your LED street lights to stay bright and safe. Good maintenance access helps you do this. Follow these best practices to keep your lights working well:
Record the brightness of each lamp after you install it.
Measure the brightness at regular times. Clean the lamp if it gets 20% dimmer.
Check lighting levels often and set up a cleaning plan.
Inspect the lamp’s outside and inside wiring to make sure everything is safe.
Easy access to your lights means you can fix problems fast. You save time and money, and your streets stay well-lit for everyone.
Regular checks and smart mounting choices help you keep your LED street lights shining bright year after year. 🛠️
Lifespan and Warranty
Rated Life
When you choose LED street lights, you want them to last a long time. The rated life tells you how many hours the lights will work before they start to get dim or fail. LED street lights stand out because they last much longer than older types of street lights. You can see the difference in the table below:
Lighting Technology | Typical Lifespan (Hours) |
|---|---|
LED | 50,000 - 100,000+ |
HPS | 10,000 - 20,000 |
MH | 10,000 - 20,000 |
LED street lights can shine for up to 100,000 hours. That means you might not need to replace them for over 20 years if you use them for 12 hours each night. High-pressure sodium (HPS) and metal halide (MH) lights only last about 10,000 to 20,000 hours. You will need to change those much more often.
Tip: Longer lifespan means fewer replacements and less time spent on repairs. You save money and keep your streets bright.
Warranty Terms
You should always check the warranty before you buy LED street lights. A good warranty protects you if something goes wrong. Most top brands offer warranties that last from 5 to 10 years. Some even cover the full rated life of the light.
Look for these key points in a warranty:
Coverage for both parts and labor
Clear terms about what is included
Support for early failures or defects
A strong warranty gives you peace of mind. You know you will not face big costs if a light fails early. Always read the warranty details so you understand what is covered.
🛡️ A solid warranty and a long-rated life help you make a smart investment in your city’s lighting.
Permitting and Equipment
Required Permits
You must get the right permits before you put in LED street lights. Permits make sure your project is safe and follows local rules. Start by talking to your city or county office. They will tell you what forms you need. Some places want electrical permits. Others may ask for building permits or an environmental check.
Follow these steps to get your permits: 1. Go to your local government office or check their website. 2. Ask for a list of permits needed for street lighting. 3. Fill out all the forms and give details about your project, like site plans and equipment. 4. Turn in your application and pay any fees. 5. Wait until you get approval before you start work.
Tip: Keep copies of your permits at the work site. Inspectors might want to see them while you are installing the lights.
Equipment Selection
Picking the right equipment helps your LED street lights last longer and work better. You should choose products that meet strict standards and fit your project. Look for lights with directional beams, strong cases, and high efficiency.
Check these main things when you pick equipment:
Criteria | Details |
|---|---|
Luminaire Standards | Must meet IEC 60598 or ANSI C.136. |
Outdoor Design | Needs directional lighting capability. |
Housing Material | Use extruded or die-cast aluminum. |
Heat Dissipation | Include heavy-duty heat sinks. |
Ingress Protection | Must have an IP66 rating. |
Impact Resistance | Meet IK09 or higher standard. |
Weight Limit | Should not exceed 15 kg. |
Mounting Compatibility | Fit poles with 60-76 mm diameter. |
LED Driver Requirements | Use drivers from trusted brands like Inventronics or Philips. |
LED Chip Requirements | Comply with ANSI/NEMA/ANSLG C78.377 and have ≥120 Lm/W efficacy. |
If you pick equipment that meets these standards, you will have fewer problems and lower repair costs. Your streets will be safer and brighter for a long time.
Cost Considerations
Upfront vs. Long-Term
When you plan your LED street lighting project, you need to look at both the upfront cost and the long-term savings. Many people focus only on the price to buy and install the lights. However, the money you spend to run and maintain the lights over time matters just as much. LED street lights usually cost a bit more at first than older lights, but they save you money every year.
Here is a table that shows how the costs compare for a 100W LED light and a traditional HPS light:
Type of Light | Upfront Cost | Annual Operational Cost | Daily Operational Cost |
|---|---|---|---|
100W LED | $440 | $140.16 | $0.12 |
HPS | $380 | $350.40 | $0.40 |
You can see that the LED light costs a little more to buy. Over time, you spend much less to keep it running. Lower operational costs mean you save money every year. When you consider all the Key Features, you will notice that energy efficiency and long lifespan help reduce your total expenses.
Tip: Always look at both the purchase price and the long-term costs before you decide.
ROI
Return on investment (ROI) tells you how quickly you get your money back after installing LED street lights. Most cities find that LED projects pay for themselves in just a few years. After that, you keep saving money every year.
Many cities see a payback period of 2 to 5 years for LED street lights.
In most cases, you can recover the total project cost within the first few years.
LED street lighting is one of the most cost-effective upgrades you can make for energy savings.
When you add up all the Key Features, such as energy savings, low maintenance, and smart controls, you see that LED street lights offer strong value. You make your streets safer and brighter while also making a smart financial choice.
You need to look at every key feature and installation step before picking LED street lights. Good planning gives you better results. You get brighter and clearer light. You save a lot of energy and the lights last longer. You spend less on repairs and roads are safer. The light is even, there is less pollution, and you can use smart city tools.
Make a checklist with these points.
Ask lighting experts for help that fits your needs.
This way, your streets will be safer, use less energy, and cost less to keep bright.
FAQ
What is the best color temperature for LED street lights?
You should choose 3000K for neighborhoods and 4000K to 5000K for busy roads. Warm light feels safer and reduces glare. Cool light works better for highways.
How often do you need to maintain LED street lights?
You should check your lights once or twice a year. Clean the lenses and inspect for damage. LED lights last long, so you will not need to replace them often.
Can you install LED street lights in areas without grid power?
Yes, you can use solar-powered LED street lights. These lights work well in remote places. They store energy from the sun and keep streets bright at night.
Do smart controls really save energy?
Yes! Smart controls like dimming and scheduling help you use less power. You can adjust brightness based on traffic or time. This lowers your energy bills.
What permits do you need for installing LED street lights?
You need to get permits from your local government. Most places require electrical and building permits. Always check with your city or county before starting your project.
See Also
Top 10 Considerations for Installing LED Street Lighting Systems
Choosing the Best LED Street Lights for Your Community in 2025
Exploring the Advantages and Technology of LED Street Lights
Comprehensive Overview of LED Street Light Technologies
Benefits of LED Street Bulbs: Efficiency, Longevity, and Installation
