LED Retrofit Kits: Types, Installation, and Benefits for Energy-Efficient Lighting Upgrades

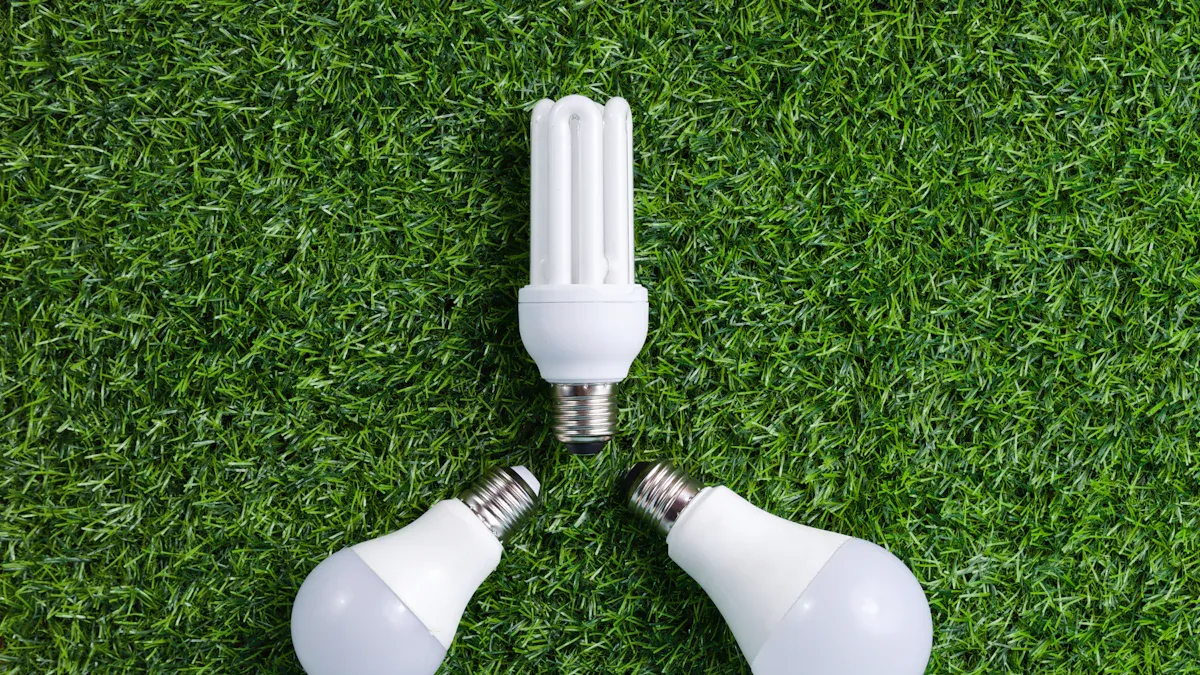
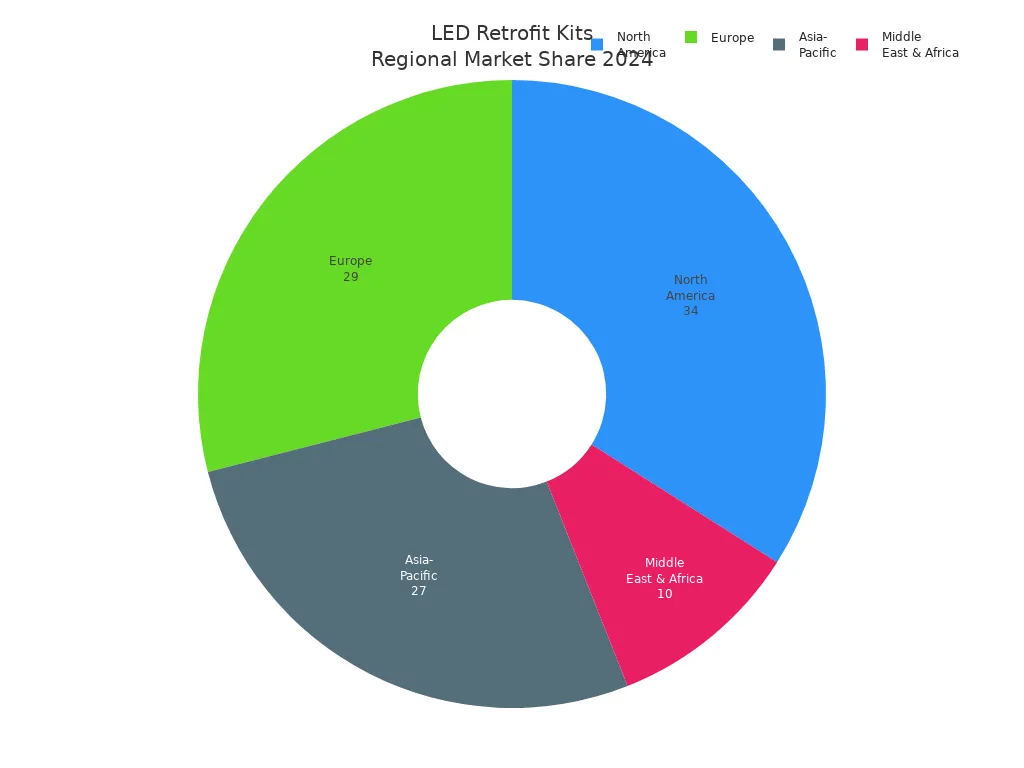
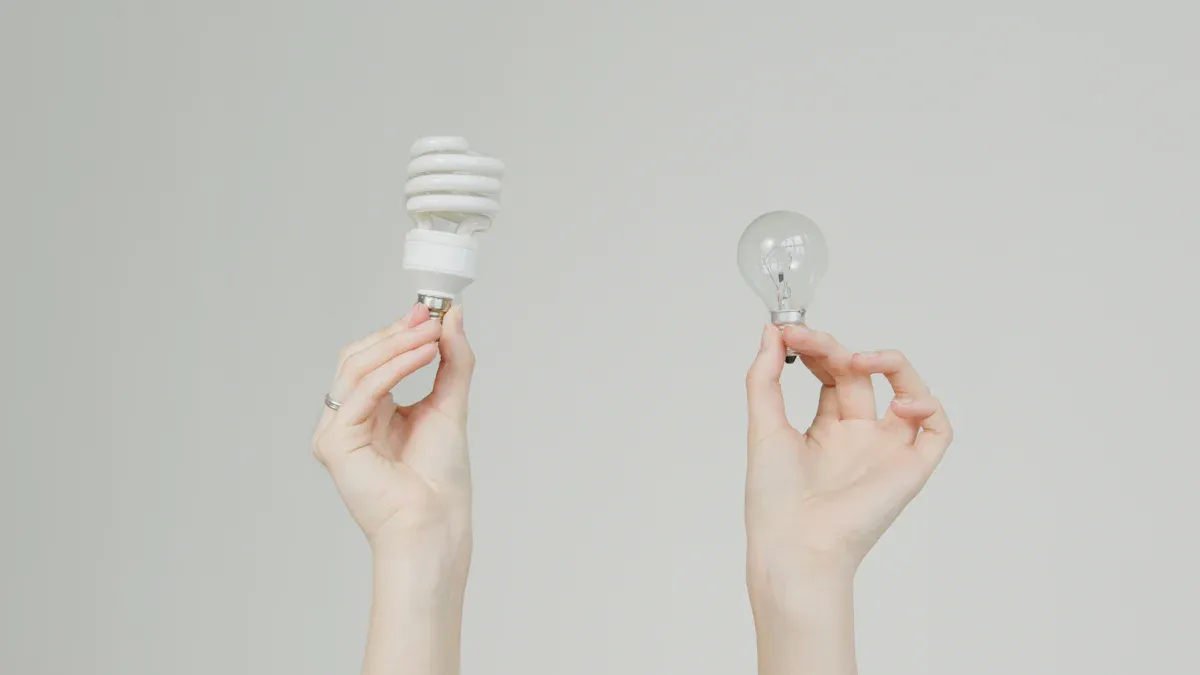
You can upgrade the lighting in your home and save a significant amount of energy with LED retrofit kits. These kits allow you to easily replace old bulbs or fixtures with advanced LED light technology. LED lights use about 75% less energy compared to traditional lighting. Many homeowners and businesses benefit from lower electricity bills and improved lighting quality after making the switch. To learn more about our products and how LED retrofit kits can enhance your space, visit the About Us section on our website. The LED retrofit kit market is rapidly expanding worldwide, as shown below.
Key Takeaways
LED retrofit kits help you upgrade old lights easily. You do not need to replace the whole fixture. This saves time and cuts down on waste.
These kits use about 75% less energy than old lights. This helps you save money on your electricity bills fast.
There are many types of retrofit kits. Some are screw-in, LED tubes, downlight, magnetic, and outdoor kits. Each type fits different needs and places.
Installing LED retrofit kits is easy if you follow safety steps. Take out old parts carefully. Make sure the kit matches your fixture.
Upgrading with LED retrofit kits makes light better. The lights last longer. They also help the environment by using less energy and making less waste.
LED Retrofit Kits Overview
What Is an LED Retrofit Kit
An LED retrofit kit is a set that helps you change old lights to LED lights. You do not have to get rid of the whole fixture. These kits let you use new LED technology in your current lights. Most kits come with several parts that work together for better lighting and energy savings.
Here are the main things you will find in a regular LED retrofit kit:
LED driver
LED module
Metal pan
Mounting accessories (threaded rod, mounting hardware, wiring hardware)
Screws and fasteners
Wiring and sockets
Brackets
Description | |
|---|---|
LED Light Source | The main part that makes light, and it comes in different strengths and brightness levels. |
LED Driver | This part controls the power so the LED works well and lasts longer. |
Mounting Hardware | These are brackets, screws, and other tools to hold the parts in place inside the fixture. |
You can use these kits to make your lights better without taking out the whole fixture. This saves time and cuts down on waste. LED retrofits let you keep the same look in your room but give you better light.
Why Choose LED Retrofit Kits
If you want to make your lights better, LED retrofit kits have many good points. You can put them in faster than getting all new fixtures. You only need to change the lamp or inside parts, so it is easy and does not bother people much. This is great for busy places like offices, schools, or hospitals.
Many owners pick LED retrofit kits because they cost less at first. Retrofit kits can be 10% to 30% cheaper than buying new fixtures. You also do not have to pay extra to throw away your old fixtures. This helps the environment and makes less trash. LED retrofits use about 75% less energy than old lights, so you save money on your power bill. Your lights will not get as hot, which can help keep rooms cooler.
LED retrofit kits are simple to use and do not need much training. Your workers can use the same wires and steps they already know. You get your money back fast, sometimes in just two or three years. With LED lighting, you save energy, spend less, and make your space nicer for everyone.
Types of LED Retrofit Kits

When you want to update old lights, there are many retrofit kits. Each kit works best for different places and needs. Here are some common types you might find when looking for led retrofitting solutions.
Screw-In Kits
Screw-in retrofit kits are like regular light bulbs. You just take out the old bulb and put in the new led. This makes changing old lights fast and simple. You do not need special tools or to change the wires. These kits save money on installation. But, if you use them in closed fixtures, the led might not last as long because of heat. Dimming can also be harder with these kits. Screw-in retrofit kits are good for homes, offices, and places that need a quick upgrade.
Tip: Always pick certified retrofit kits for safety and best results.
LED Tubes
LED tubes replace old fluorescent tubes in places like schools and offices. There are three main types: Type A uses the old ballast, Type B skips the ballast and connects to power, and Type C uses its own driver. Type B and C often need new sockets to be safe. Many experts say retrofit kits with their own drivers work better and have fewer problems. LED tubes help save energy and lower repair costs, but you must check if they fit before you install them.
Downlight Kits
Downlight retrofit kits let you update recessed lights in kitchens, bathrooms, and offices. You keep the old housing but get new, energy-saving led retrofits. These kits usually fit 4-, 5-, or 6-inch housings. You can choose the color and use dimming features. Downlight kits work well in homes and businesses. They give bright, even light and last a long time.
Magnetic Kits
Magnetic retrofit kits make it easy to update old troffers and panels. You stick the led strips and driver on with magnets, so no tools are needed. The job only takes a few minutes. Magnetic kits fit many fixture sizes and work with different wattages. You can use them in offices, schools, and stores. These led retrofitting solutions are quick and help you save time.
Outdoor and Industrial Kits
Outdoor and industrial retrofit kits are made for tough places. They use strong materials like die-cast aluminum and polycarbonate lenses. These kits can handle water, dust, and very hot or cold weather. You can use them for parking lots, streetlights, and factories. They last over 50,000 hours and help save energy. Outdoor kits also make places safer by giving bright, clear light.
Examples of Use Cases | |
|---|---|
Residential | Kitchens, bathrooms, living spaces |
Commercial | Offices, schools, retail stores |
Industrial | Warehouses, factories |
Outdoor | Streetlights, parking lots, signage lighting |
You can see that led retrofit kits are used in many places. Updating old lights with the right kits helps save energy, make lighting better, and lower costs.
Installation Process for an LED Retrofit Kit
Upgrading your lighting with a led retrofit kit can seem challenging, but you can complete the installation process for an led retrofit kit by following clear steps. This guide will help you stay safe, remove old parts, install new led components, and check your work. You will also learn how to avoid common mistakes and know when to ask for professional help.
Preparation and Safety
Before you start any retrofit project, you need to prepare your workspace and protect yourself. Safety should always come first. Here are some important steps to follow:
Turn off the power at the breaker box. This step prevents electric shock.
Use a voltage tester to make sure the power is off before you touch any wires.
Wear safety glasses to protect your eyes from dust or falling debris.
Put on gloves to protect your hands and help you grip tools.
Wear non-slip shoes, especially if you need to use a ladder.
Tip: Always double-check that the power is off before you begin working on any fixture.
You should also gather all the tools you need before you start. Most led retrofit kit installations require a screwdriver, wire strippers, wire nuts, a voltage tester, and a ladder. Having everything ready will make the process smoother and safer.
Removing Old Components
You need to remove the old lighting parts before you can install your new led retrofit kit. Follow these steps to take out the old components safely:
Gather your tools: screwdriver, wire strippers, wire nuts, voltage tester, ladder, gloves, and safety glasses.
Turn off the circuit breaker that controls the light fixture.
Use the voltage tester to confirm that there is no power.
Remove the old bulb by unscrewing or rotating it out of the socket.
Take off the fixture cover or diffuser to reach the wiring.
Disconnect the wires by unscrewing the wire nuts.
If needed, unscrew and remove the fixture from the ceiling or wall.
Some retrofit kits may require you to remove the ballast, especially if you are replacing fluorescent tubes. Always check the instructions that come with your kit to see if you need to remove extra parts.
Installing the LED Retrofit Kit
Now you are ready to install the new led retrofit kit. Each kit may have slightly different steps, but most follow a similar process:
Inspect the fixture housing to make sure it matches the retrofit kit. Clean out any dust or debris.
Connect the retrofit kit’s plug to the existing light socket or wiring, following the instructions.
Attach the ground wire if your kit requires it.
Insert the retrofit kit into the fixture. Secure it with clips, springs, or screws as needed.
Attach the trim or cover to finish the look.
Note: Always follow the manufacturer’s instructions for your specific led retrofit kit. If you feel unsure about any step, consider asking a licensed electrician for help.
You should also check that the retrofit kit matches the voltage and wattage of your fixture. Using the wrong type can cause poor lighting or even damage the kit.
Testing and Troubleshooting
After you finish the installation, you need to test your new led retrofit kit to make sure it works properly. Here is what you should do:
Turn the power back on at the breaker.
Flip the light switch to see if the led lights up.
Check for flickering, dimming, or any strange noises.
If you notice any problems, here are some common issues and solutions:
Problem | Possible Cause | Solution |
|---|---|---|
Light does not turn on | Incorrect wiring or loose connection | Check all wire connections and try again |
Incompatible dimmer or wiring issue | Use a dimmer made for led lights | |
Wrong size or type of kit | Measure fixture and use correct kit | |
Overheating or short lifespan | Poor ventilation or wrong installation | Follow manufacturer’s guidelines |
Tip: Clean the fixture before installing the retrofit kit. Dust and dirt can block light and reduce brightness.
If you cannot solve the problem, or if you feel unsure about the wiring, you should contact a professional electrician. This step keeps you safe and protects your investment.
By following these steps, you can complete the installation process for an led retrofit kit with confidence. You will enjoy better lighting, lower energy bills, and a safer home or business.
Benefits of LED Retrofit Kits
When you upgrade your lights with LED retrofit kits, you get many good things. You will save energy, have better light, and spend less money. These led benefits make your lights work better and last longer.
Energy and Cost Savings
Switching to led lighting helps you save a lot of energy. Many businesses save up to 80% on their energy bills each year. This means you pay less for electricity. Most people get their money back in less than a year. Sometimes, you see savings in just a few months if you use rebates or grants. LEDs can last up to 100,000 hours, so you do not need to change bulbs often. This saves you both money and time.
Lighting Quality
LED lighting gives you brighter and clearer light than old bulbs. High color rendering index (CRI) values, usually above 90, help you see colors better. This is important in stores, galleries, and offices. You can also choose the color temperature that fits your room. These led benefits help make your space comfortable and nice to be in. Your lights will look brighter and more welcoming.
Longevity and Durability
LED retrofit kits last much longer than other types of bulbs. Look at this table:
Lighting Type | Typical Lifespan (hours) | Additional Notes |
|---|---|---|
LED Retrofit Kits | 25,000 to 50,000 | Longest lifespan, durable, energy-efficient |
Fluorescent Bulbs | 7,000 to 15,000 | Moderate lifespan, some lumen loss |
Incandescent Bulbs | ~1,000 | Short lifespan, needs frequent changes |
LED retrofit kits can last over 50,000 hours. You will not need to change them as often, which saves you money and time.
Environmental Impact
LED lighting is good for the environment and saves energy. Here are some important points:
You use up to 80% less energy, so you make less pollution.
LEDs last longer, so you throw away fewer old bulbs.
LEDs do not have dangerous stuff like mercury.
These led benefits make your lights safer and better for the planet.
When you switch to LED retrofit kits, you save energy, get better light, and make your lighting system work better. You get all these good things without much trouble during installation.
Choosing a Kit
Assessing Fixtures
You need to start your led lighting upgrade by checking your current fixtures. Look at the type and condition of each fixture. Make sure you know if you have troffers, recessed cans, or outdoor lights. Check the wiring and see if it matches the new led retrofit kit. If you skip this step, you might pick the wrong kit and face problems like flickering or overheating.
Check if your fixtures work with new led kits.
Make sure the wiring can handle the power needs.
Look for signs of damage or old parts.
Think about heat management to avoid short lifespans.
Hire a professional if you feel unsure about the installation.
A careful assessment helps you avoid common mistakes when retrofitting old fixtures. You will get a safer and more reliable upgrade.
Matching Lighting Needs
You want your led lighting upgrade to fit your space. Start by measuring your fixtures. Pick a retrofit kit that matches the size. Decide how bright you want your lighting system to be. Choose the right color temperature for your room.
Identify your fixture type and measure its size.
Pick the right brightness (lumens) and color temperature.
Check if you need wide or narrow beam angles.
Make sure the kit works with your voltage and dimmers.
Look for extra features like dimming or smart controls.
If you match your lighting needs, your led fixture upgrade will give you the best results. You can also add layers of lighting for better comfort and style.
Certifications and Standards
You should always check for certifications before you buy a retrofit kit. These labels show that your led lighting upgrade meets safety and quality rules.
Certification/Standard | Purpose/Focus | Why It Matters |
|---|---|---|
UL, ETL | Safety | Keeps your upgrade safe and legal |
DLC, ENERGY STAR | Efficiency | Helps you save energy and get rebates |
RoHS | Environment | Limits harmful materials |
IC Rated, Damp/Wet | Safety | Protects in special places like wet areas |
These certifications help you pick the right led fixture upgrade for your lighting solutions. They also make sure your retrofit will last and work well.
Budget and ROI
You want your upgrade to save money. Calculate your return on investment (ROI) before you buy.
Find out how much you will save each month on your energy bill.
Divide your monthly savings by the upfront cost of the retrofit kit.
The payback period tells you how fast your upgrade pays for itself.
A shorter payback period means you start saving sooner. Many led lighting upgrades pay for themselves in less than two years. If you use rebates or special programs, your savings can grow even faster. Always balance your budget, energy goals, and the needs of your lighting system for the best retrofit.
You can save a lot of energy with LED retrofit kits. These kits also make your lighting look better. Upgrading is easy and helps your home or business for years. You can start by doing these steps:
Check your lights and make a plan to show why you need new ones.
Look for rebates and get ready for the work.
Get experts to help and make sure your new lights work right.
If you want more help, check out these resources:
FAQ
What is the main benefit of using an LED retrofit kit?
You can save energy and money with an LED retrofit kit. These kits help you upgrade old lights without replacing the whole fixture. You get brighter light and lower electric bills.
Can you install an LED retrofit kit yourself?
You can install many LED retrofit kits by yourself. Always turn off the power first. Use basic tools like a screwdriver and wire strippers. If you feel unsure, ask a licensed electrician for help.
How long do LED retrofit kits usually last?
Most LED retrofit kits last between 25,000 and 50,000 hours. You will not need to change them often. This long life saves you time and reduces waste.
Where can you use LED retrofit kits?
You can use LED retrofit kits in homes, offices, schools, and outdoor areas. They fit many types of fixtures, such as troffers, recessed cans, and streetlights. You can find answers to many frequently asked questions about led retrofit kits in this section.
See Also
Different Types And Advantages Of Installing LED Replacement Lights
Modern LED Street Bulbs Offering Efficiency And Long Lifespan
Best Practices For Installing Various LED Exterior Lighting Types
Tips And Benefits For Installing Outdoor LED Lights Everywhere
Exploring Types And Design Tips For Recessed Lighting Installation
