Understanding Pole Light Systems: Components, Configurations, and Installation

You rely on pole light systems to keep outdoor spaces bright and safe after sunset. These systems help you see clearly, prevent accidents, and make public areas feel welcoming. You often find them in many places, such as:
Streets
Parking lots
Public parks
Proper installation gives you better efficiency and longer-lasting lighting. If you want to improve a Home, learn more About Us, or choose the best Product, understanding how these systems work can help you make smart decisions.
Key Takeaways
Pole light systems help people see better outside. They make places like streets, parking lots, and parks safer.
Picking strong materials and good designs for poles and fixtures helps them last longer. This also means you spend less money fixing them.
Installing pole lights needs good planning. You must check the site first. You also need to follow local rules. This keeps everyone safe and makes things work well.
LED lights are a smart pick for pole lights. They use less energy and last a long time. This helps you save money over time.
Checking and fixing pole light systems often is important. It keeps them working and safe. This stops big repairs from costing a lot later.
Pole Light Systems Overview
What Are Pole Light Systems
Pole light systems help make outdoor places brighter and safer. They have a pole, a light fixture, and electrical parts. You see them where people walk, drive, or gather at night. These systems do more than just give light. They help you see things better. They help you feel safe. They make public places nicer at night.
Here is a table that shows what pole light systems do:
Function | Description |
|---|---|
Safety | Lights up areas so people can see and move safely. |
Security | Makes it easier to watch for crime and keeps people safe. |
Uses less energy and helps the environment. | |
Aesthetic Appeal | Makes public places look better and matches the style. |
Pole light systems help stop accidents. They make it easier to walk or drive at night. Good lights also make public places look nice.
Common Applications in Site Lighting
Pole light systems are found in many outdoor places. Here are some places you see them:
Parking lots
Streets and roadways
Public parks and playgrounds
School campuses
Shopping centers
Poles can hold more than just lights. Some have cameras, antennas, or banners for events. Some poles have outlets for charging cars or sensors for weather and traffic.
When you walk or drive in these places, you notice the lights. They help you feel safe. They help you see where you are going. Good lighting keeps crime away. It lets you enjoy being outside after dark.
Pole Light System Components
When you look at pole light systems, you see several important components working together. Each part has a special job. These components help you get safe, bright, and long-lasting lighting in any location.
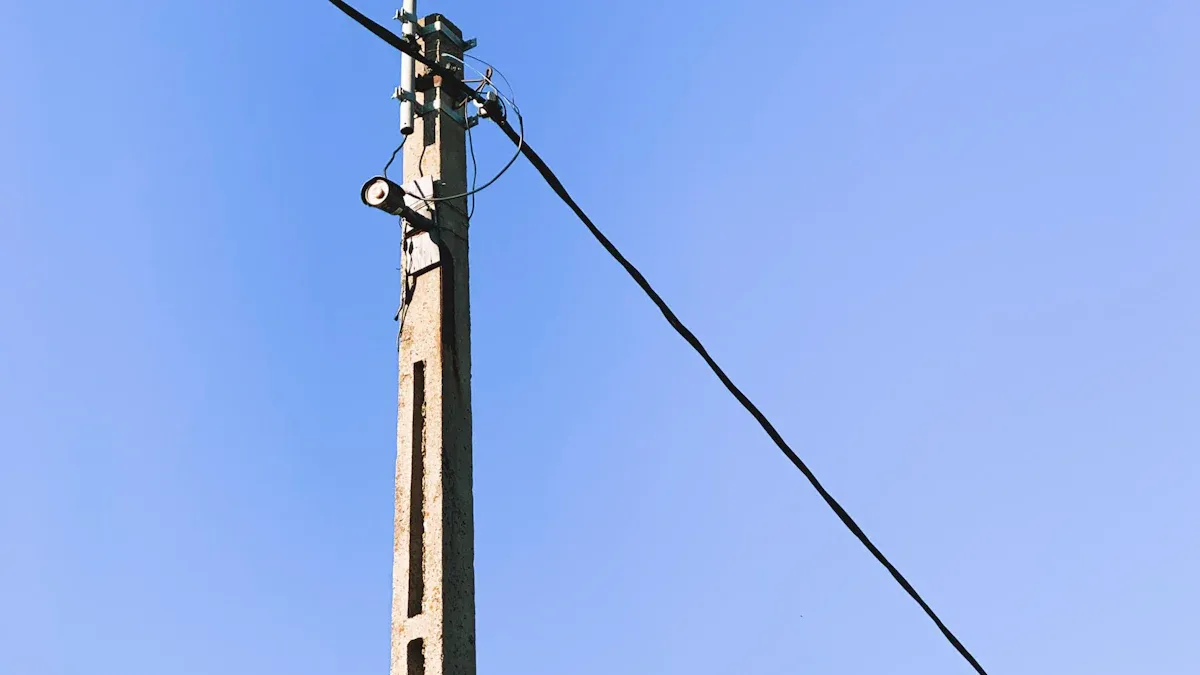
Poles and Materials
Poles support the lighting fixtures and stand tall in every location. You can choose from different types of street light poles, each made from unique materials. The material you pick affects how long the pole lasts, how much care it needs, and how it looks.
Here is a table to help you compare the most common materials:
Material | Properties | Benefits | Lifespan (years) | Maintenance Needs |
|---|---|---|---|---|
Steel | Very strong, flexible design, cost-effective | Handles high winds, supports many fixtures, good for big projects, rust protection with coating | 40-50 | Moderate |
Aluminum | Lightweight, corrosion resistant, looks nice | Durable, easy to install, long life, can be powder-coated or anodized for extra protection | 30-50 | Low |
Fiberglass | Non-conductive, corrosion resistant, light | Great for coastal areas, easy to install, safe, flexible looks | 50+ | Very Low |
You often see steel poles in busy locations like parking lots or streets. Aluminum poles work well in places where you want a modern look. Fiberglass poles are best for areas near the ocean or where safety is a big concern. Each type of street light pole gives you different strengths.
Light Fixtures and Lamps
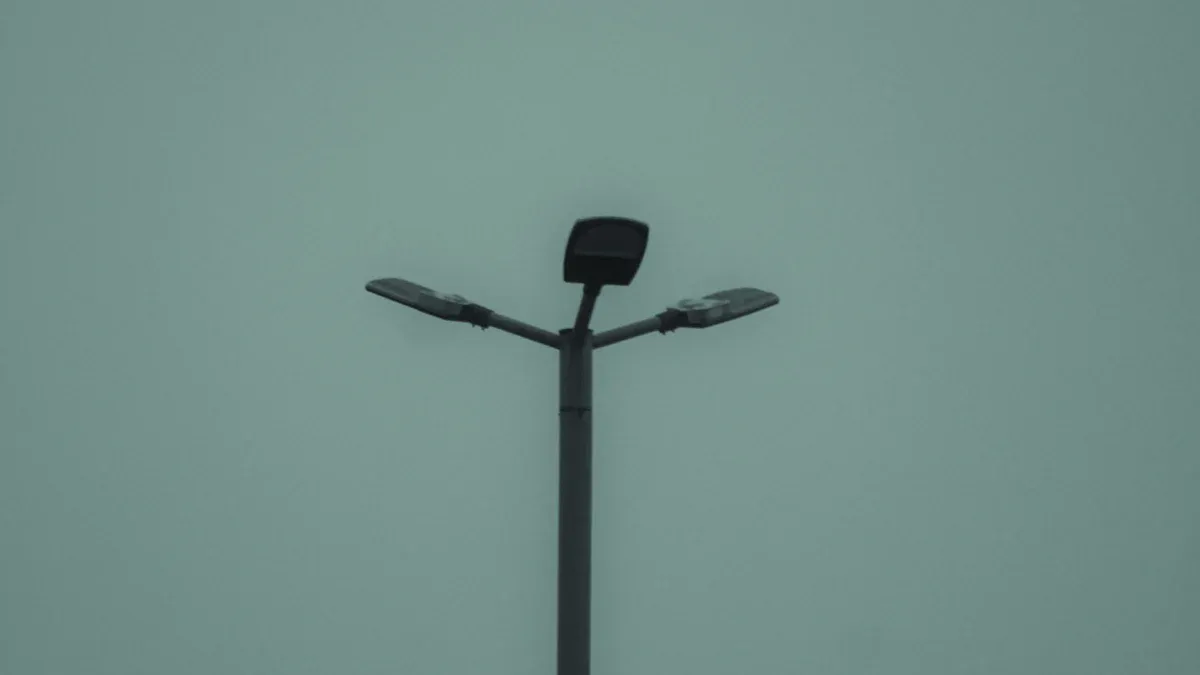
Lighting fixtures sit at the top or side of the pole. These fixtures hold the lamps and direct the light where you need it. You can pick from many types of lighting fixtures for your location.
Decorative post lamps: These look fancy and fit well in parks or neighborhoods.
Utilitarian lamps: These focus on strength and work best in parking lots or business areas.
Solar pole lamps: These use sunlight and help you save energy, especially in remote locations.
LED pole lamps: These shine bright, last a long time, and let you adjust the light.
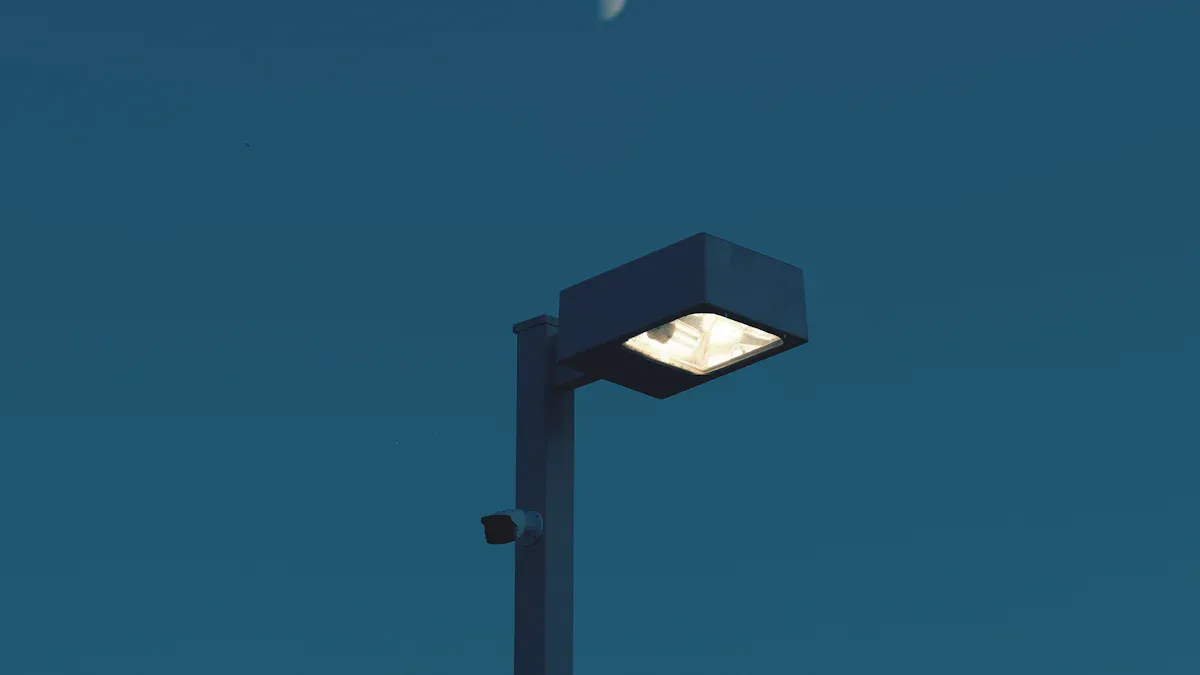
Most new lighting fixtures use LED technology. LEDs use less energy and last much longer than old bulbs. Some fixtures even have smart features. You can set timers or change the brightness from far away. This helps you save money and energy.
Tip: LED lighting fixtures can last up to 100,000 hours. You will not need to replace them often, which saves you time and money.
Bases and Foundations
The base or foundation keeps the pole steady in every location. This part is one of the most important components of a light pole. A strong base stops the pole from tipping over or shaking in the wind.
Here is a table showing what you need to think about for a safe base:
Design Requirement | Description |
|---|---|
Foundation Type | Most poles use drilled shafts or spread footings for support. |
Failure Modes | Poles can tip, bend, or twist if the base is weak or the wind is strong. |
Soil Considerations | You must check the soil strength at your location. Ignore frost depth for most jobs. |
Groundwater Assumption | Groundwater usually sits about 3 feet below the ground. |
Common causes of foundation failure include:
Shallow or weak foundations that cannot hold the pole in strong winds.
Anchor bolts that are loose or not straight.
Not checking wind or soil conditions at your location.
You must make sure the base matches the soil and weather at your site. This keeps your pole light systems safe and stable for many years.
Electrical Wiring and Controls
Wiring and controls connect the lighting fixtures to power. You find these components inside the pole or underground at each location. Good wiring keeps the lights working and safe.
Some important components include:
Hand hole cover: Lets you reach the wires for repairs.
Pole cap: Covers the top if you do not have a light there.
Vibration dampener: Stops shaking in windy places.
Side brackets: Hold extra lights or equipment.
Electrical outlets: Give power for decorations or tools.
Banner holders: Let you hang banners for events.
Light pole tenon and adapters: Help you add or change lighting fixtures.
Smart controls can make your lighting fixtures even better. You can dim the lights when fewer people are around. You can turn them up when you need more light. Some systems let you control the lights from your phone or computer. This saves energy and lowers your bills.
Note: Smart controls help you use less power and keep your location bright only when you need it.
When you put all these components together, you get a strong, safe, and smart lighting system for any location. You can choose the right types of street light poles, lighting fixtures, and controls to fit your needs.
Configurations of Pole Light Systems
Types of Poles and Heights
You can choose from different pole heights to fit your lighting needs. Most commercial sites use poles that are 20 to 30 feet tall. Parking lot light poles usually stand between 20 and 30 feet. For wider roadways and highways, poles often reach 25 to 40 feet. The height you pick affects how much area the light covers. Taller poles shine light over a bigger space, so you need fewer fixtures. If you use poles that are too tall, you might light up areas you do not want, which can cause light pollution. Shorter poles focus light in smaller spots, but they can create shadows and dark areas that make places less safe.
Mounting Options
You have several ways to mount your light fixtures. Each option works best for certain places:
Pole Mounting: Great for large spaces like parking lots and sports fields. This method gives you wide coverage and even lighting.
Wall Mounting: Works well on building sides and security zones. You can install lights on existing walls for targeted lighting.
Ground Stake Mounting: Perfect for gardens and temporary events. You can move these lights easily to change your setup.
Tip: Choose the mounting option that matches your site’s needs and the type of area you want to light.
Lighting Technologies
Most new pole light systems use LED technology. LEDs last a long time, use less energy, and do not get very hot. Many sites now use solar-powered lights, which use sunlight to make electricity. These lights help you save money and protect the environment. Some systems also use smart controls, so you can adjust the lights from your phone or computer.
Material Choices
You can pick from many materials for your poles. Each material has its own cost and lifespan. Here is a table to help you compare:
Material Type | Initial Cost | Lifespan | Maintenance Needs |
|---|---|---|---|
High-Quality | Higher | Longer | Lower |
Composite | Moderate | Very Long | Very Low |
Wood | Lower | Shorter | Higher |
Concrete/Steel | Higher | Longer | Moderate |
High-quality and composite materials last longer and need less care. Wood costs less at first but does not last as long. Lighter materials can make installation easier and cheaper. When you choose a material, think about how long you want the pole to last and how much you want to spend.
Note: The right configuration depends on your site, weather, and how you plan to use the lights. Always match your choices to your project’s needs.
Light Pole Installation Process
A successful installation of pole light systems starts with careful planning and follows a clear step-by-step process. You need to pay attention to every detail to ensure safety, efficiency, and long-lasting results. Here is how you can approach light pole installation from start to finish.
Planning and Site Assessment
You begin by choosing the right spot for your light pole installation. This step helps you get the best lighting coverage and avoid future problems. Follow these steps:
Select the Perfect Location: Walk around the area. Look for places that need more light. Check for trees, buildings, or other things that might block the light.
Assess Ground Conditions: Test the soil. Find out if it is rocky, sandy, or clay. Good soil keeps the pole steady.
Check for Underground Utilities: Call your local utility companies. Make sure you do not dig into water, gas, or power lines.
Obtain Permits and Meet Regulations: Visit your city or county office. Get the permits you need. Make sure your plan follows local building codes and zoning laws.
Hire Licensed Contractors: Choose professionals who know the rules and have experience with light pole installation.
Tip: Always follow local regulations and building codes. This keeps your project safe and legal.
Foundation and Base Preparation
A strong foundation is key for proper installation. You want your pole to stand straight and resist wind or weather. Here is how you prepare the base:
Prepare the Site: Mark the spot for the pole. Measure the area to make sure the light will cover the right space.
Excavate and Prepare the Ground: Dig a hole deep enough for the pole base. Remove rocks, roots, and debris.
Pour Concrete and Set Anchor Bolts: Build a form for the concrete. Pour the concrete mix and insert anchor bolts. Make sure the bolts are straight and secure. Let the concrete cure fully before moving on.
When you choose your materials, use a strong concrete mix that matches your local weather. Pick corrosion-resistant anchor bolts and space the rebar correctly. Taller or heavier poles need deeper foundations. If your soil is loose or wet, you may need a larger base.
Installing the Light Pole
Once the foundation is ready, you can start installing the light pole. This step requires care and the right tools.
Position the Pole: Place the pole over the anchor bolts. Use a level to make sure it stands straight.
Secure the Pole: Tighten the nuts on the anchor bolts. Do not over-tighten, as this can damage the base.
Attach Fixtures and Accessories: Add the light fixtures, brackets, and any extra equipment like banners or outlets.
You may face challenges during this step. Vibration can cause stress on the pole. You can use a vibration dampener or change the pole type to fix this. Avoid sharp angles in the pole design to prevent cracks. Choose round or tapered poles for better strength.
Challenge | Mitigation Strategy |
|---|---|
Vibration causing stress | Install a vibration dampener, change pole location, modify landscaping, or use different pole types. |
Fatigue stress cracking | Avoid sharp angles in pole design, and ensure proper handling during transportation and installation. |
Premature failure of components | Use round or tapered poles, prefer steel over aluminum, and select poles with larger diameters. |
Note: Always use the right installation methods for your pole type and site conditions.
Electrical Connections
Safe and reliable electrical connections are vital for your pole light systems. Follow these steps for proper installation:
Pull Cables Through Conduits: Run the wires through the underground conduit to the pole’s handhole.
Connect the Luminaire: Follow the wiring diagram for your light fixture. Make sure all connections are tight.
Install Proper Grounding: Bond the pole and system to a ground rod. Use tested clamps and connections.
Secure and Seal Joints: Use connectors and insulation to keep out water and dust. Seal all handholes and junction boxes.
Label Circuits and Poles: Mark each wire and pole. This helps with future repairs and keeps your system organized.
Most failed inspections happen because of grounding issues or loose connections. Take your time with this step. Use proper ground rods and follow local electrical codes. Labeling wires helps you avoid mistakes and makes maintenance easier.
Final Inspection and Testing
After installing the light pole and making all connections, you need to check your work. This step ensures your installation meets safety standards and works as planned.
Visual Examination: Look for cracks, rust, or loose bolts on the pole and base.
Physical Inspection: Use tools to check if the pole is stable and grounded.
Load Testing: Apply weight to the pole to see if it can handle strong winds or heavy fixtures.
Function Test: Turn on the lights. Make sure they work as expected and cover the right area.
Electrical Testing: Perform a hi-pot test to check for current leaks. Test the insulation and grounding.
Torque Test: Check that all screws and bolts are tight.
Documentation and Reporting: Write down your findings. Keep records for future inspections and repairs.
Tip: Schedule regular inspections after installation. This helps you catch problems early and keeps your pole light systems safe and reliable.
By understanding installation methods and following each step, you can achieve a proper installation that lasts for years. Always use the right installation methods, follow safety rules, and keep good records. This approach leads to a successful installation and helps you get the most from your lighting investment.
Installation Considerations
Environmental and Soil Factors
You have to think about the environment and soil before you start. These are important steps before installing pole light systems. Different soils, weather, and pole heights change your setup. Look at the table below to see how these things affect your work:
Factor | Description |
|---|---|
Soil Type | Clay, sand, or rock need different depths to stay stable. |
Environmental Conditions | Strong winds or earthquakes need deeper foundations for safety. |
Tall poles and heavy lights need stronger, deeper bases. | |
Soil Moisture Content | Wet soil can make poles wobbly, so you must dig deeper. |
Future Maintenance | Make sure you can reach the pole for repairs and checks. |
You need to check these things to stop problems later. Good planning keeps your systems safe and steady.
Safety and Regulations
You must follow all rules and codes to keep people and property safe. Safety is always the most important part of installation. The table below shows important standards for pole light systems in the United States:
Code/Standard | Description |
|---|---|
ASHRAE/IES 90.1 | Sets energy rules for buildings and outdoor lighting. |
International Energy Conservation Code (IECC) | Gives energy rules for homes and businesses. |
Local Building Codes | Control pole height, placement, and safety features. |
Ask your city about local rules. Following these codes is a key step before you start. You keep your systems legal and safe by following them.
Maintenance and Longevity
You want your systems to last a long time. Regular care helps you find problems early and fix them fast. Here are some tips:
Check poles and lights often for rust or damage.
Fix small problems right away to stop bigger ones.
Clean poles to stop rust. Use mineral spirits on powder-coated poles. Use 600 grit sandpaper for galvanized steel or anodized aluminum.
Paint steel poles again when needed.
Ask people in your area to report damage or outages.
These steps help your systems stay strong and bright.
Energy Efficiency
Energy efficiency is important for saving money and helping the planet. You should pick luminaires with high efficacy ratings. The luminaire efficacy rating (LER) tells you how much light you get for each watt. Higher numbers mean better efficiency. See the table below for outdoor lighting standards:
Category | Luminaire Efficacy Rating (LER) |
|---|---|
Outdoor pole/arm-mounted area luminaires | ≥ 136 |
Outdoor pole/arm-mounted decorative luminaires | ≥ 112 |
Many energy codes now want you to use efficient systems. You save money and help the earth by using the best technology.
Site Lighting Installation Tips
Choosing the Right System
You want your site lighting installation to work well and last a long time. Start by selecting the perfect location for each pole. This step helps you get the best light coverage and keeps people safe. You should look at several important factors before you choose a system. The table below shows what you need to think about:
Factor | Description |
|---|---|
Pole Design | Pick a style that matches your area. Traditional or modern designs can change how your space looks and works. |
Technical Specifications | Check the height, diameter, and how much weight the pole can hold. These details keep your system safe. |
Environmental Impact | Choose energy-saving lights and materials. This helps the planet and lowers your bills. |
Cost Considerations | Think about the price now and the cost to keep the system working in the future. |
You should always match the system to your needs. If you want a modern look, pick sleek poles and LED fixtures. For parks or historic areas, choose classic designs. Make sure you check the technical details so your poles stay strong in wind and weather. When you focus on these factors, your site lighting installation will fit your project and last for years.
Tip: Selecting the perfect location for each pole helps you avoid dark spots and wasted energy.
Cost and Budget Planning
Planning your budget is a key part of any site lighting installation. You need to look at both the price to buy the system and the money you will spend to keep it running. Start by making a list of all costs. Include poles, fixtures, wiring, labor, and permits. Do not forget about future maintenance and repairs.
Here are some steps to help you plan:
Write down every cost before you start.
Compare prices from different suppliers.
Choose energy-efficient lights to save money over time.
Set aside money for repairs and upgrades.
You can use a simple table to track your budget:
Item | Estimated Cost | Notes |
|---|---|---|
Poles | $ | |
Fixtures | $ | LED recommended |
Wiring | $ | Underground preferred |
Labor | $ | Licensed contractor |
Permits/Fees | $ | Local codes apply |
Maintenance | $ | Annual checkups |
If you plan well, your site lighting installation will stay on budget and give you the best results. Good planning means fewer surprises and a safer, brighter space.
You now know the basics of pole light systems, from their main parts to how you install them. Careful planning and a strong foundation help your lights last longer and work safely. Always follow local rules and codes.
Check your site before you start.
Choose the right materials.
Ask a professional if you have questions.
Remember: Safe, efficient lighting starts with smart choices and regular care.
FAQ
What are the main benefits of using light poles for outdoor lighting?
You get better visibility and safety with light poles. These poles help you see at night in parking lots, parks, and along the street. They also make public spaces look more welcoming and help prevent accidents.
How do you choose the right height for street light poles?
You should look at the area you want to light. Taller street light poles cover more space. Shorter poles focus light in smaller spots. Always check your lighting requirements before you start your lighting project.
Why are LED lights popular for pole lights?
You save energy and money with LED lights. These lights last longer than old bulbs. LED lights also give you bright, clear lighting for your street or parking lot. Many people pick LED for energy efficient lighting options.
What should you check before the installation of street light poles?
You need to check the soil, weather, and local rules. Make sure your lighting project meets all codes. Look for underground wires or pipes. Good planning helps your light poles stay safe and strong.
How often should you inspect and maintain light poles?
You should check your light poles and lighting fixtures at least once a year. Look for rust, cracks, or loose parts. Clean the poles and replace any broken LED lights. Regular care keeps your lighting system working well.
See Also
Selecting Ideal LED Street Light Poles: Key Factors to Consider
Advantages of LED Outdoor Lighting: Varieties and Installation Tips
Guide to Installing Street Light Poles: Ensuring Safety and Longevity
Integrating Commercial Lighting Systems: Strategies for Peak Performance
