Recessed LED Spotlights: Installation Methods, Benefits, and Top Product Recommendations


If you want a modern way to brighten up your home, recessed LED spotlights make a great choice. These lights stay hidden in your ceiling, giving rooms a clean look and flexible lighting. Check out how many people love them:
Statistic | Value |
|---|---|
Adoption increase | 36% |
Products with dimming functions | 41% |
Consumers choosing for design appeal | 47% |
You get more than style. Recessed LED spotlights use up to 80% of their energy for light, unlike old bulbs that waste most of it. They also last up to 25,000 hours. Whether you want to upgrade your About Us page, show off a Product, or just make your space shine, these lights can help.
Key Takeaways
Recessed LED spotlights use much less electricity. They can save up to 80% compared to regular bulbs. This helps you pay less for power.
These lights look smooth and modern. They make your home look nice. You do not need big, bulky lights.
You need to plan before you install them. Draw a simple layout first. Always check for wires and pipes before you cut. This keeps you safe.
Pick the right size and type for your room. This helps you get the best light and mood.
Clean your lights and check the connections often. This helps them work well and last longer.
What Are Recessed LED Spotlights?
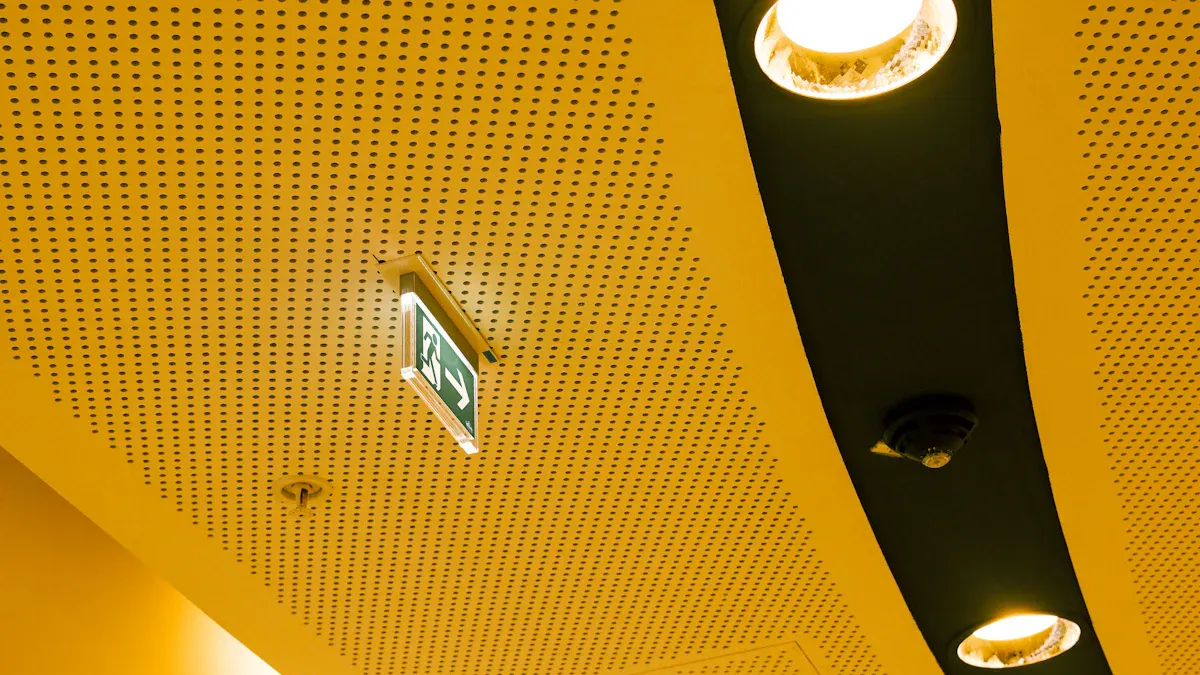
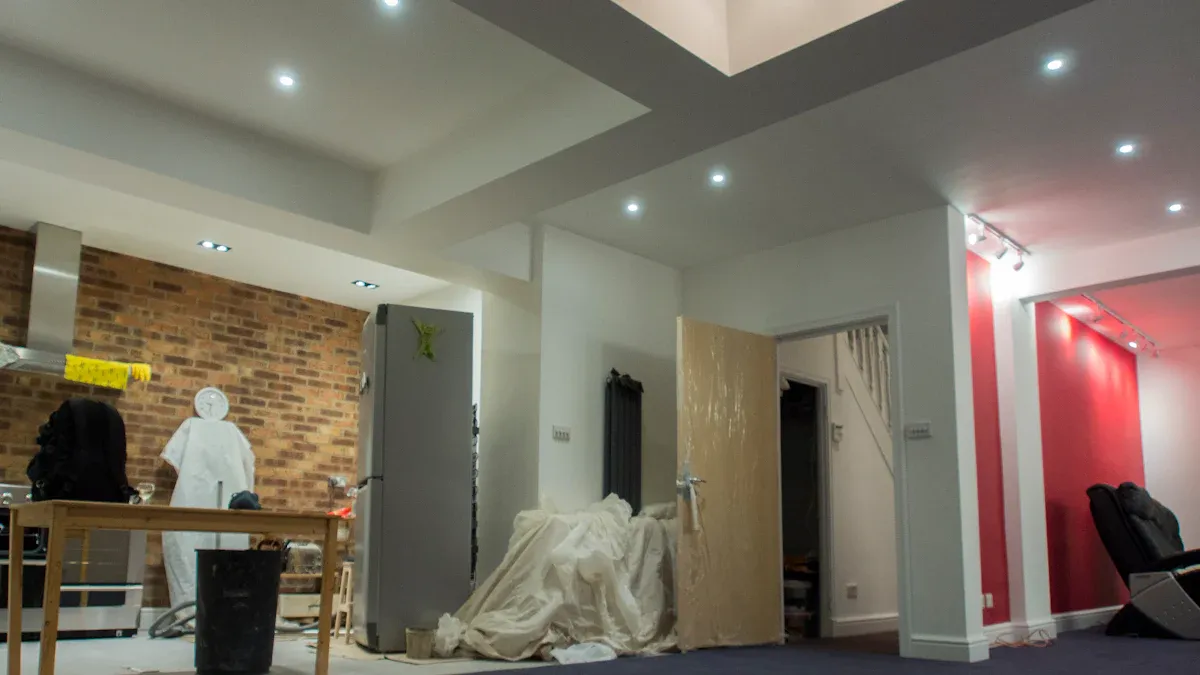
Recessed LED Spotlights are lights that fit right into your ceiling. You see only the glow, not the fixture. People often call them can lights or pot lights. These lights shine down from above and blend into your room. You get a modern look without bulky lamps or hanging fixtures.
Key Features
When you choose Recessed LED Spotlights, you get more than just light. Here are some features that make them stand out:
Aesthetic appeal: These lights give your space a clean, modern look. They almost disappear into the ceiling.
Versatility: You can use them for many things, like lighting up a whole room, focusing on a work area, or highlighting art.
Space efficiency: Since they sit inside the ceiling, they save space. This works great in small rooms or places with low ceilings.
Customization: Many spotlights let you adjust the direction of the light. You can point them where you need them most.
Ambient lighting: They spread light evenly, so you avoid harsh shadows and get a cozy feel.
IC rating: Some models are safe to use near insulation, which helps prevent fire risks.
Dimmable functionality: You can change the brightness to match your mood or activity.
Selectable color temperatures: Pick warm or cool light to fit your style.
Wet rated design: Some spotlights work well in bathrooms or kitchens where moisture is common.
High CRI: Colors look bright and true under these lights.
Tip: If you want a room to feel bigger and brighter, try using several spotlights spaced evenly across the ceiling.
Types and Applications
You can find different sizes of recessed spotlights. Each size works best in certain spaces:
Size | Description | Typical Applications |
|---|---|---|
4-inch | Good for small spaces and tight corners | Small rooms, closets, or hallways |
6-inch | Covers more area with bright light | Living rooms, kitchens, or stairwells |
8-inch | Best for big, open spaces or commercial buildings | High ceilings, entryways, or offices |
You can use these lights for many jobs:
Task lighting in kitchens or workspaces
Highlighting art or cool features in your home
Setting the mood with adjustable brightness and color
Recessed LED Spotlights work well almost anywhere. You can use them to light up a whole room or just add a special touch to one area. They fit in homes, offices, and even stores.
Benefits of Recessed LED Spotlights
Energy Efficiency
You want to save money on your energy bills, right? Recessed LED Spotlights help you do just that. These lights use much less electricity than old-fashioned bulbs. In fact, LEDs use about 80-85% less electricity than incandescent bulbs. That means you get the same bright light but pay a lot less for it.
Recessed LED fixtures can save up to 80% energy compared to incandescent lighting.
LED lighting consumes up to 75% less energy than traditional incandescent bulbs and lasts 25 times longer.
LEDs consume 50-60% less electricity than CFLs for the same amount of light.
You also do not have to change them as often. These spotlights last for years, so you spend less time and money on replacements. If you want a greener home and lower bills, switching to Recessed LED Spotlights makes a big difference.
💡 Tip: Try replacing all your old ceiling lights with LEDs. You will notice the savings on your next bill!
Flexible Lighting Design
Do you like to change the look of your rooms? Recessed LED Spotlights give you lots of options. You can place them anywhere in your ceiling to create the mood you want. These lights come in many trim styles, finishes, and sizes. You can mix and match to fit your style.
Recessed LED spotlights provide a minimalist look, keeping your ceiling free of bulky fixtures.
You can choose from different trims and finishes to match your room.
Mixing trim options lets you get creative and add visual interest.
You can point some lights at your favorite painting or use others to brighten up a reading nook. The design choices are almost endless. You get to decide how your space feels and looks.
Aesthetic Appeal
Everyone wants their home to look good. Recessed LED Spotlights help you create a clean, modern look. These lights sit flush with the ceiling, so you do not see any big fixtures hanging down. This makes your rooms feel open and uncluttered.
Strategically placed recessed lights can create a warm ambiance and highlight special areas.
Recessed lighting gives your home a streamlined look that fits modern design.
These lights blend in with any style, from classic to contemporary.
You can use them to make a cozy corner or to show off a piece of art. The soft, even light makes every room feel more inviting. You get style without any fuss.
🏡 Note: Many designers love using recessed lights because they work with almost any decorating style.
Versatility for Spaces
You can use Recessed LED Spotlights in almost any room. They work great in living rooms, kitchens, and even bathrooms. Want to light up your patio or walkway? These spotlights can do that, too.
In homes, use them for ambiance in living rooms, task lighting in kitchens, or mood lighting in dining areas.
In stores or offices, they highlight products and help people focus.
Outdoors, they light up patios and paths, making your space safer and more beautiful.
You get one lighting solution for many needs. Whether you want to cook, read, relax, or entertain, these spotlights fit right in.
🌟 Pro Tip: Try using dimmable spotlights in your living room. You can set the mood for movie night or brighten things up for a party.
Installation Guide
Planning and Preparation
Before you start cutting holes in your ceiling, take some time to plan. Good planning helps you avoid mistakes and makes your project look professional. Here’s how you can get started:
Decide where you want your lights. Think about what you want to highlight or brighten up.
Space your lights at least 4 feet apart if you’re putting them in a row. Keep them about 2 feet away from the walls.
Turn off the power to the room before you do anything else.
Check above your ceiling for wires, pipes, or anything that could get in the way.
If you feel unsure about electrical work, it’s always smart to call an electrician.
📝 Tip: Sketch your lighting plan on paper first. This helps you see if your layout will give you even light.
Tools and Materials
You’ll need the right tools and materials to make your installation safe and easy. Here’s a handy table to help you gather what you need:
Tools/Materials | Description/Use |
|---|---|
Non-contact voltage tester | Makes sure no electricity is flowing before you start. |
Drill with bits | For making holes in the ceiling. |
Wire strippers | Removes insulation from wires. |
Electrical tape | Secures electrical connections. |
Drywall saw | Cuts the ceiling for your new lights. |
Ladder | Helps you reach the ceiling safely. |
Safety goggles and gloves | Protects your eyes and hands. |
Insulation covers | Keeps lights from overheating if you have insulation. |
Recessed light fixtures | The main part of your new lighting. |
LED bulbs | Use bulbs that fit your fixtures. |
Electrical cables | Usually 14/2 NM cable for wiring. |
Junction box | For safe electrical connections. |
Wire nuts | Holds wires together. |
Ceiling patch | Optional, for fixing mistakes or changes. |
🛠️ Pro Tip: Double-check your ceiling structure before you start. Make sure it can support the new fixtures.
Safety Tips
Safety comes first when working with electricity and ceilings. Here are some important rules to follow:
Safety Guidelines for Recessed LED Spotlights | Details |
|---|---|
Heat Buildup | Don’t block ventilation. Avoid too much insulation around the lights. Leave enough space above the fixture. |
Safe Installation Requirements | Keep at least 3 inches between fixtures. Make sure there’s good airflow. Stay clear of ceiling joists. If your lights aren’t IC-rated, keep insulation away. |
Wiring Considerations | Use the right wire size. Make tight connections. Don’t pinch or stretch wires. Mount the junction box securely. |
Circuit Management | Don’t overload the circuit. A 15-amp circuit can handle up to 12 fixtures. Use dimmers that work with your lights. Check connections regularly. |
⚡ Note: Always check your fixture’s IC rating before installing. This tells you if it’s safe to use near insulation.
Step-by-Step Installation
Ready to get started? Here’s a simple step-by-step guide:
Turn off the power at the breaker box. Use a voltage tester to make sure the power is really off.
Mark your spots on the ceiling using a template. Double-check your measurements.
Cut the holes with a drywall saw or hole saw.
Run the wires from your power source to each hole. Secure the cable within 12 inches of each box and every 4.5 feet.
Connect the wires: Match black to black (hot), white to white (neutral), and green or bare to ground. Use wire nuts and electrical tape.
Install the housing so it sits flush with the ceiling. Snap the clips to hold it in place.
Seal any gaps with fire-rated caulk to keep air from leaking.
Insert the LED bulbs and trim.
Label the circuit and write the date for future reference.
Turn the power back on and test your lights. Look for flickering or hot spots.
💡 Tip: Take your time with each step. Rushing can lead to mistakes or uneven lighting.
Wiring Basics
Wiring might sound scary, but you can handle it if you follow the basics:
Step | Action | Checkpoint |
|---|---|---|
1 | Identify your ceiling type | Pick new-construction or remodel housing |
2 | Check for insulation | Use IC/AT-rated fixtures if insulation is present |
3 | Sketch your layout | Follow spacing and perimeter rules |
4 | Pick trim and CRI rating | Use 90+ CRI for kitchens and galleries |
5 | Confirm dimmer compatibility | Make sure your LED drivers meet UL 8750 |
6 | List code compliance | Include IC, AT, UL, and DLC/Title 24 if needed |
Always shut off the breaker before you touch any wires.
Use the right gauge wire for your fixtures.
Secure cables and junction boxes so nothing moves around.
Test your lights before you finish up.
🧰 Note: If you’re not sure about wiring, ask a professional for help. It’s better to be safe.
Common Mistakes
Even experienced DIYers make mistakes. Here are some of the most common ones and how you can avoid them:
Placing fixtures too close or too far apart: Keep them 4 to 6 feet apart for even light.
Picking the wrong trim style: Choose trims that fit your room and reduce glare.
Forgetting about dimming: Make sure your fixtures and switches work together if you want dimmable lights.
Ignoring ceiling height and room size: Adjust your plan for taller ceilings or bigger rooms.
Skipping the planning step: A good plan saves you time and money.
Not checking for wires or pipes: Always look above the ceiling before you cut.
Overloading the circuit: Count your fixtures and check your breaker’s limits.
🚩 Watch Out: Recessed LED Spotlights cost more upfront than regular lights, but you save money over time with lower energy bills and fewer replacements.
Troubleshooting & Maintenance
Common Issues
After you install recessed LED spotlights, some problems can happen. Here are the most common problems people see:
Installation safety issues
Dim light output
Color inconsistency
Intermittent lighting
Unexpected outages
Buzzing noise
Glare
If your lights look dim or flicker, check the wiring. Make sure the bulbs fit tightly in the fixture. If colors look different, you may have mixed brands or models. Buzzing sounds can mean the dimmer switch does not match your LED bulbs. Glare can happen if you pick the wrong trim or put lights too close together.
🛠️ Tip: If your lights flicker or go out, reset the breaker or change the bulb. If problems do not stop, call an electrician for help.
Cleaning and Care
Cleaning your spotlights helps them stay bright and last longer. Manufacturers suggest a few easy steps:
Maintenance Practice | Description |
|---|---|
Proper Installation and Mounting | Make sure fixtures are snug and secure to prevent damage. |
Implementing Lighting Controls and Dimming | Use dimmers to lower brightness and help spotlights last longer. |
Maintaining Stable Operating Temperatures | Keep fixtures cool and away from insulation to avoid overheating. |
Regular Cleaning and Dusting | Wipe lenses and trims with a soft cloth to remove dust and dirt. |
Checking for Loose Connections and Damaged Parts | Look at wires and parts every few months to stay safe. |
Verifying Proper Heat Dissipation | Make sure air can move around the fixture to keep it cool. |
✨ Note: Dust can block light and make spotlights look dull. Clean them every few months for the best shine.
When to Replace
Sometimes, you need to replace your recessed LED spotlights instead of fixing them. Watch for these signs:
Flickering or uneven brightness
Damage to the fixture
Strange noises or burning smells
Circuit breakers trip often
Change in color temperature
If you see any of these problems, it is safer and easier to replace the spotlight. New fixtures use less energy and give better light.
🚨 Pro Tip: If you smell burning or hear odd noises, turn off the power right away and replace the fixture.
Top Product Recommendations
Choosing the right Recessed LED Spotlights can feel overwhelming, but you have great options for every room and budget. Let’s break down the top picks so you can find what works best for your space.
Best Overall Picks
When you want the best, look for lights that check all the boxes. Here’s what you should consider:
Criteria | Why It Matters |
|---|---|
Ceiling Height | Higher ceilings need brighter lights for even coverage. |
Dimming Capabilities | Dimmable lights let you set the mood. |
Room Purpose | Kitchens need bright light; bedrooms do better with softer lighting. |
Fixture Type | Downlights, gimbal lights, and baffle trims each offer unique benefits. |
Light Output | Check lumens and color temperature for the right feel. |
Energy Efficiency | ENERGY STAR lights save money and last longer. |
Lifespan | LEDs can last up to 25,000 hours, so you change bulbs less often. |
Installation | Some fixtures are easy to install yourself; others may need a pro. |
🏆 Tip: Pick ENERGY STAR certified lights for the best mix of savings and performance.
For Kitchens & Bathrooms
You need bright, safe, and moisture-resistant lights in these rooms. Here are some top-rated choices:
Product Name | Lumens | Color Temp | Wet-Rated | Dimmable | Fire Rating |
|---|---|---|---|---|---|
NuWatt’s 5/6" Retrofit LED Recessed Can Light | 1300 | 2700K–5000K | Yes | Yes | N/A |
NuWatt’s 6" 2-Hour Fire-Rated Recessed Light | 1200 | 2700K–5000K | Yes | Yes | 2-Hour |
NuWatt’s 4" MR16 LED Retrofit | 600 | 2700K–5000K | Yes | Yes | N/A |
These lights handle steam and splashes, making them perfect for kitchens and bathrooms.
For Living Areas
Living rooms and family spaces need flexible lighting. You want lights that look good and work well.
Product Name | Best For | Features | Wattage | Color Temp |
|---|---|---|---|---|
Amico 6-Inch Ultra-Thin LED Recessed Lighting | Best Overall | Adjustable color, slim design | 12W | 2700K–5000K |
Torchstar 4-Inch Basic Series LED | Best Value | Dimmable, affordable | 10W | 2700K–5000K |
Cloudy Bay Smart Wi-Fi LED | Best Smart | Wi-Fi enabled, smart controls | N/A | N/A |
💡 Note: Adjustable color temperature lets you switch from cozy to bright in seconds.
Budget Options
You can get quality lights without spending a lot. Here are some favorites:
LED Downlight AC 220V: $1.49, Rating: 4.60 – “Didn’t expect much—surprised me!”
Dimmable LED Ceiling Lamp: $11.49, Rating: 4.68 – “Bright, dimmable, and just what I needed.”
LED Mini Spotlight: $11.67, Rating: 4.57 – “Love how thin and bright it is.”
Hot Sale LED Panel Light: $10.06, Rating: 4.62 – “Flat light, no glare—just perfect!”
Ultra-thin LED Downlight: $16.82, Rating: 4.55 – “Ultra-slim and bright — total win.”
You can light up your home and still save money.
Smart & Dimmable Choices
Smart and dimmable lights give you control and convenience. Look for these features:
Feature | What It Means |
|---|---|
Form Factor | Retrofit or flush-mount for easy upgrades. |
Color Temperature | Tunable white or full-spectrum for any mood. |
Beam Angle | Wide for general light, narrow for accents. |
Compatibility | Works with Alexa, Google Assistant, or HomeKit. |
Durability | Long life and energy savings. |
Integrated Features | Voice control, dimming, scheduling, and music-syncing. |
Installation | Simple setup with most ceilings. |
Cost-Effectiveness | Good value for the features you get. |
🎛️ Pro Tip: Smart lights let you control your home’s vibe with just your voice or phone.
Buying Tips
Think about your ceiling height and room size before you buy.
Pick lights with the right brightness and color for each room.
ENERGY STAR and wet-rated labels mean better safety and savings.
Read reviews to see how real users rate performance and reliability.
You can trust that today’s LEDs save energy, last for years, and light up your home beautifully. Recessed LED Spotlights work in almost any space and style.
Recessed LED spotlights give you many benefits. They help you save energy and money. These lights last a long time. Your home looks modern and fresh with them. Remember these points:
LEDs lower your electricity bill and help the environment.
You can choose from lots of styles and colors.
Always check your ceiling and wires before installing.
If you are not sure, call an electrician for help. Smart lighting can make your home worth more and save you money.
Benefit | Home Value Impact | Energy Impact |
|---|---|---|
Aesthetic Appeal | Makes your home look better | — |
Energy Efficiency | — | Lowers electricity costs |
Low Maintenance | Adds value to your home | — |
Eco-Friendly | Attracts new buyers | Reduces carbon footprint |
FAQ
How many recessed LED spotlights do you need for a room?
You can use one light for every 4 to 6 square feet of ceiling space. For a small room, four to six spotlights work well. Always check your room size and layout.
Can you install recessed LED spotlights in a bathroom?
Yes, you can! Just pick wet-rated or damp-rated spotlights. These lights handle steam and splashes. Look for the wet rating on the box before you buy.
Do recessed LED spotlights work with dimmer switches?
Most LED spotlights work with dimmers. You need to use a dimmer that matches LED bulbs. Check the packaging or ask the store to make sure your lights and dimmer are compatible.
How long do recessed LED spotlights last?
LED spotlights last a long time. Many work for up to 25,000 hours. That means you might not need to change them for years, even if you use them every day.
What should you do if a spotlight flickers or buzzes?
First, check the bulb and wiring. Make sure the bulb fits tight. If you use a dimmer, make sure it works with LEDs. If the problem stays, call an electrician for help.
See Also
Exploring Recessed Lighting: Design, Types, And Installation Tips
Understanding LED Area Lights: Uses, Advantages, And Installation Tips
Choosing Outdoor LED Lights: Varieties, Advantages, And Setup Advice
LED Exterior Lighting: Types, Advantages, And Installation Guidelines
LED Replacement Lights: Varieties, Perks, And Installation Insights
