Recessed Lighting: Types, Installation, and Design Considerations

Recessed lighting, often referred to as can lights, is both simple and stylish. It fits seamlessly into the ceiling, providing a neat appearance and excellent illumination. You can use this product to highlight artwork, illuminate work areas, or create a cozy atmosphere.
The popularity of recessed lights continues to rise. In 2023, the market was valued at $5.1 billion, and by 2032, it is projected to grow to $7.8 billion, with an annual growth rate of 5.2%. LED lights, known for their energy efficiency, are the most favored option. Approximately 40% of recessed lights are installed in homes, demonstrating that people appreciate both their aesthetic appeal and functionality.
Key Takeaways
Recessed lighting gives rooms a neat, modern style. It’s great for showing off art or setting a mood.
LED recessed lights save energy and last much longer than regular bulbs. They are a smart way to save money.
Plan carefully when installing. Place lights about six feet apart for even lighting.
The trim you pick changes the light. Baffle trims give soft light, while open trims give bright, direct light.
Use recessed lights with other fixtures to make spaces look nice and work well. This creates bright and cozy rooms.
Types of Recessed Lighting
Standard Recessed Lights
Standard recessed lights, also called can or pot lights, are popular. These lights are installed inside the ceiling for a neat look. They work well in kitchens, living rooms, and hallways. LED bulbs are often used because they save energy and last long. You can pick trims like baffle or open to change the style. This lighting is great for brightening rooms or highlighting areas in your home.
Retrofit Recessed Lights
Retrofit recessed lights upgrade old fixtures without big renovations. They are great for switching to energy-saving LED lights. Many kits fit into current sockets, making installation easy and cheap.
LED kits take less time and cost less to install.
They use existing housings, making the process simple.
LEDs last longer, so you replace them less often, saving money.
If you want affordable, modern lighting, retrofit recessed lights are a smart option.
Trimless Recessed Lights
Trimless recessed lights give a sleek, modern look. Unlike standard lights, they have no visible trims and blend into the ceiling. This design is perfect for contemporary spaces. Models like the DXH-02 Astro are energy-efficient and last longer than older lights.
People love how trimless lights look. They fit smoothly into ceilings, making them popular for modern homes and offices. If you want a polished, high-end style, trimless recessed lights are a great choice.
LED Wafer Lights
LED wafer lights are thin and modern recessed lights. They work well in places with low ceilings. Unlike regular recessed lights, they don’t need a housing can. This makes them easy to install in tight spots like basements or attics.
A big benefit of LED wafer lights is saving energy and lasting long. The table below shows how they compare to regular bulbs:
Feature | LED Wafer Lights | Incandescent Bulbs |
|---|---|---|
Energy Use | Uses more energy | |
Lifespan | Lasts 25 times longer (35,000-50,000 hours) | 1,000-2,000 hours |
Energy Savings | Saves up to 70% on energy bills | N/A |
These lights come in different color tones to match your mood. You can pick warm light for relaxing or cool light for working. Their slim look and energy savings make them a favorite for modern homes.
Adjustable or Directional Recessed Lights
Adjustable recessed lights can tilt or turn to aim light. This makes them great for lighting up art or special areas. You can point the light exactly where you want it.
Studies show adjustable lights make people happier by offering choices. The table below explains their benefits:
Feature Description | How It Helps Users |
|---|---|
Lights can tilt to highlight art or features. | Improves room style and usefulness. |
Brightness and color can be changed for moods. | Lets users set lighting for any activity. |
Flexible lights let users control their space. | Creates a better and more focused area. |
If you need flexible lighting, these are a great pick. They mix style with function and work in any room.
Shower-Grade Recessed Lights
Shower-grade recessed lights are made for wet places. They are perfect for bathrooms, showers, or outdoor areas. These lights must meet UL safety rules to handle moisture. The table below explains the UL types:
UL Listing Type | What It Means |
|---|---|
UL Listed for Dry Locations | Safe for dry places with no moisture. |
UL Listed for Damp Locations | Good for areas with some moisture, like bathrooms without direct water. |
Safe for places with direct water, like showers. |
When buying shower-grade lights, pick ones marked "wet location." These are sealed to keep water out and last longer. They also come in many styles to match your home’s design.
Baffle Trim and Open Trim Lights
When picking recessed lights, baffle and open trims are useful. Each type helps set the right mood for your room.
Baffle trim lights cut down on glare. Their ridged inside absorbs extra light, making it softer. These lights work well in cozy spaces like bedrooms or living rooms. If you want a calm and relaxing feel, choose baffle trims.
Open trim lights, however, give off bright, direct light. They are great for places like kitchens or offices where you need strong lighting. Open trims let light shine fully, making work areas bright and clear.
Here are some benefits of these trims:
Open trims give strong light, perfect for bright spaces.
Baffle trims soften light, creating a warm, comfy feel.
Both types come in stylish designs to match your décor.
Think about the room’s purpose when choosing trims. Use open trims for focused light, like over a kitchen counter. Pick baffle trims for soft light in spots like a bedroom or reading corner.
Eyeball Trim and Gimbal Lights
Eyeball and gimbal lights make recessed lighting more flexible. These lights can be adjusted to shine exactly where you need them. They are great for showing off art, special features, or specific areas.
Eyeball trims stick out slightly and can tilt or swivel. This makes them good for accent lighting, like highlighting a painting or wall décor.
Gimbal lights look modern and sit flat with the ceiling. They can still be adjusted to aim light where needed. This makes them useful for both tasks and accents.
Here’s why these lights are a good choice:
Eyeball trims have a classic look and highlight features.
Gimbal lights are sleek and adjustable for many uses.
Both types let you control where the light shines.
These lights are perfect for spaces needing flexibility. For example, use gimbal lights in a hallway to light up art pieces. In a living room, eyeball trims can brighten a fireplace or bookshelf.
How to Install Recessed Lighting
Pre-Installation Planning
Before putting in recessed lighting, make a clear plan. Draw the room and mark where each light will go. A good layout helps create the right mood and ensures the lights work well. For even lighting, place the lights about six feet apart.
Check local rules and codes before starting. Some places need permits for electrical work. Plan the wiring from the breaker box to the lights carefully. Move furniture out of the way and cover surfaces with cloths to keep things clean and safe during the job.
Tools and Materials Needed
Using the right tools and materials is key for success. Below is a list of tools you’ll need:
Tools You’ll Need |
|---|
Screwdriver |
Drywall saw |
Electrical tape |
Fish tape |
Hacksaw blade |
Hammer |
Needle-nose pliers |
Voltage tester |
Right angle drill |
Stepladder |
Stud finder |
Tape measure |
Utility knife |
Wire stripper |
You’ll also need recessed lighting fixtures, energy-saving bulbs, and the right housing for your ceiling. These parts fit neatly into the ceiling, hiding wires and giving a clean look.
Step-by-Step Installation Process
Follow these steps to install recessed lighting easily:
Mark light spots: Decide and mark where the lights will go.
Prepare the area: Move furniture and cover surfaces with cloths.
Turn off power: Shut off electricity at the breaker box for safety.
Remove old fixtures: Take out any existing lights or hardware.
Cut ceiling holes: Use a saw to make holes, avoiding wires or pipes.
Run wires: Drill a path and pull wires through the ceiling.
Connect wires: Match wire colors and connect them in the junction box.
Install housing: Secure the housing in the ceiling as per instructions.
Add the trim: Snap the trim on for a finished look.
Insert bulbs: Use the right bulbs to avoid overheating.
Wire the circuit: Connect wires to the panel, following local rules.
Test the lights: Turn power back on and check if lights work.
By following these steps, you can install recessed lighting safely and easily. Good planning and the right tools make the job simple and effective.
Safety Tips and Precautions
When installing recessed lighting, safety is very important. Follow these tips to stay safe and avoid problems:
Turn off the power: Shut off electricity at the breaker box first. Use a voltage tester to make sure no wires are live.
Wear protective gear: Put on goggles and gloves to shield your eyes and hands from dust or sharp objects.
Check for obstacles: Look for hidden wires, pipes, or beams before cutting. A stud finder can help you locate these.
Use the right tools: Have proper tools like a drywall saw and wire stripper. Wrong tools can cause injuries or damage.
Follow local codes: Check building rules in your area to avoid fines or risks.
Tip: If you’re unsure about wiring, call a licensed electrician. They can ensure the job is done safely and correctly.
Common Mistakes to Avoid
Mistakes can happen when installing recessed lighting, even with planning. Avoid these errors to keep your lights working well and safely:
Overloading fixtures: Don’t use too many or high-wattage bulbs. Stick to the recommended wattage to prevent overheating.
Ignoring flickering lights: Fix flickering lights or loose connections quickly. Ignoring them can lead to bigger issues.
Skipping wiring checks: Use an AM radio to find wiring problems. Buzzing sounds mean the wiring needs fixing.
Overlooking blown sockets: A bad socket can stop the light from working. Replace it or get professional help if needed.
Improper spacing: Don’t place lights too close together. Follow spacing rules for even lighting.
Note: Take your time during installation to avoid costly mistakes. Double-check your work to ensure everything is correct.
Design Considerations for Recessed Lighting
Picking the Right Size and Trim
The size and trim of recessed lighting affect how your room looks. Fixture size decides how much light it gives and how it fits the ceiling. Common sizes are 4 to 6 inches. Smaller lights are good for focusing on things like art. Bigger lights work better for lighting up large rooms.
Trim style changes the light’s appearance. Baffle trims cut down glare and make light softer. These are great for cozy spots like bedrooms. Open trims let more light through, perfect for kitchens or workspaces. For a modern look, try trimless lights. They blend into the ceiling for a clean, simple style.
Spacing and Placement Tips
Good spacing and placement make lighting look balanced. Measure your ceiling height first. Divide that number by two to find the right space between lights. For example, with an 8-foot ceiling, place lights 4 feet apart.
Don’t put lights too close to walls. This can cause harsh shadows. Keep them at least 2 to 3 feet from walls. For task lighting, like over a counter, place lights directly above the area. In bedrooms or living rooms, mix general and accent lighting for depth.
Tip: Use adjustable lights to focus on special areas, like art or shelves.
Choosing the Best Bulb Type
The bulb type affects energy use, lifespan, and light quality. LED bulbs are the best for saving energy. They use less power and last up to 25,000 hours. Incandescent bulbs only last about 1,000 hours.
Think about color temperature and CRI when picking bulbs. For a warm, cozy feel, pick bulbs with 2700K to 3000K. For cooler, brighter light, choose 4000K. High CRI bulbs show colors accurately, which is great for kitchens or bathrooms.
Note: Make sure your bulbs match the fixture to avoid problems like overheating.
Understanding Color Temperature and Brightness
Color temperature and brightness change how a room feels. Color temperature, measured in Kelvin (K), shows if light is warm or cool. Lower numbers like 2700K give a soft, yellow glow. Higher numbers like 5000K make bright, bluish-white light. Brightness, measured in lumens, affects how lit the space feels. Picking the right mix makes rooms comfy and useful.
The table below explains how color temperatures affect users:
Color Temperature | Pros | Cons |
|---|---|---|
4000K | Gentle on eyes; Restores natural colors | Not clear in very bright areas; May not fit all styles |
5000K | Bright and cool; Good for work spaces | Can strain eyes; May feel too harsh in some rooms |
For homes, 4000K works well in living rooms. Use 5000K for kitchens or bathrooms where tasks are done. Matching brightness and color temperature helps lighting fit the room’s purpose.
Room-Specific Recommendations (e.g., kitchen, living room, bathroom)
Different rooms need different lighting plans. Kitchens, bathrooms, and living rooms each have special needs for light and style.
Room | Common Sizes | Design Tips |
|---|---|---|
Kitchen | Use smaller lights for counters; Reflectors help focus task lighting. | |
Bathroom | 4-inch | Pick wet-rated lights for showers and vanities to handle moisture. |
Living Room | 5-inch to 6-inch | Mix ambient and accent lights; Smaller fixtures highlight art or features. |
In kitchens, focus on lighting counters and islands for tasks. Bathrooms need lights that resist water, especially near showers. Living rooms benefit from layered lighting to balance general and accent light. This makes each room both practical and welcoming.
Layering Recessed Lighting with Other Fixtures
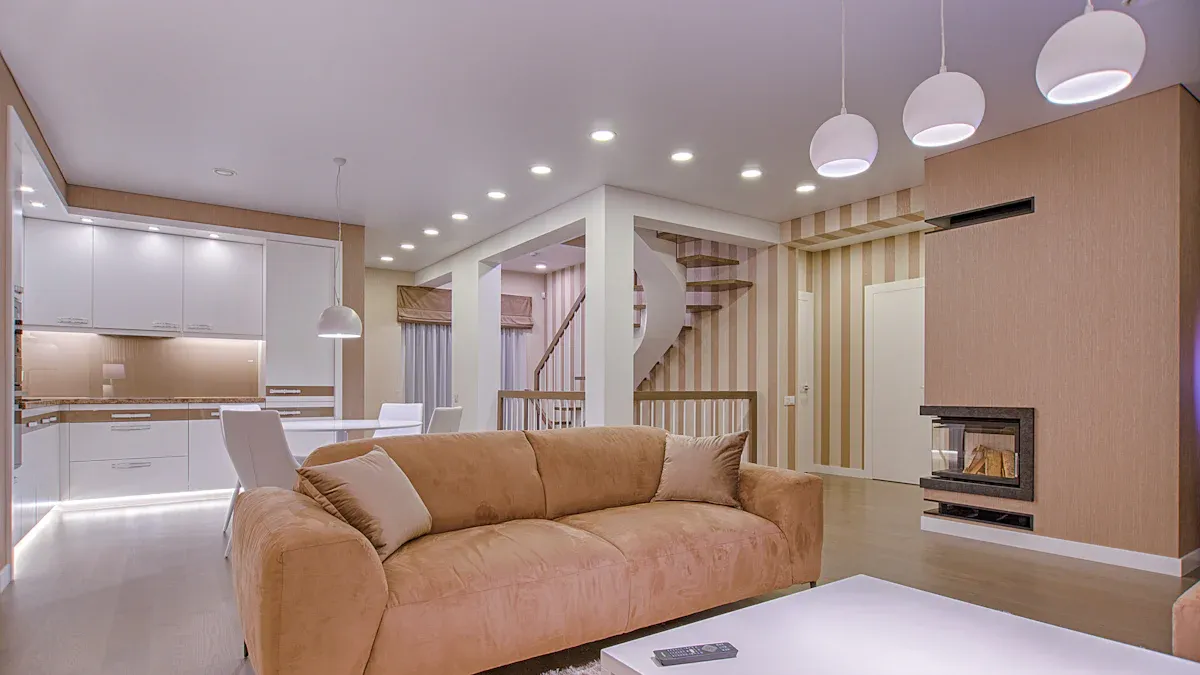
Mixing recessed lights with other fixtures adds depth and style. Combining ambient, task, and accent lighting improves looks and usefulness. For example, recessed lights with pendants in kitchens brighten work areas and look great.
The table below shows why layering lights is helpful:
Benefit | Explanation |
|---|---|
Recessed lights hide when off, making spaces look clean. | |
Saves Energy | LED designs give good light while using less power. |
Better Light Quality | Directing light improves how well-lit the room feels. |
Outside, pair recessed lights with wall sconces or string lights for a cozy vibe. Inside, use recessed lights for general light and lamps or chandeliers for style. This makes lighting both pretty and practical.
Recessed lighting is a stylish way to light your home. With options like standard, trimless, and shower-grade lights, there’s something for everyone. Planning and using the right tools make installation easier. Design choices like spacing, trims, and bulbs help create the perfect mood.
Recessed lighting isn’t just about looks. For instance, LED lights save up to 80% energy in homes and work well in data centers. The table below shows how LEDs are helpful in different places:
Where It’s Used | How It Helps |
|---|---|
Data Centers | Switching to LEDs improves energy efficiency and lowers power use. |
Homes | LEDs cut energy use by 80% compared to older lighting systems. |
General Use | Built-in LED lights last years without needing new bulbs. |
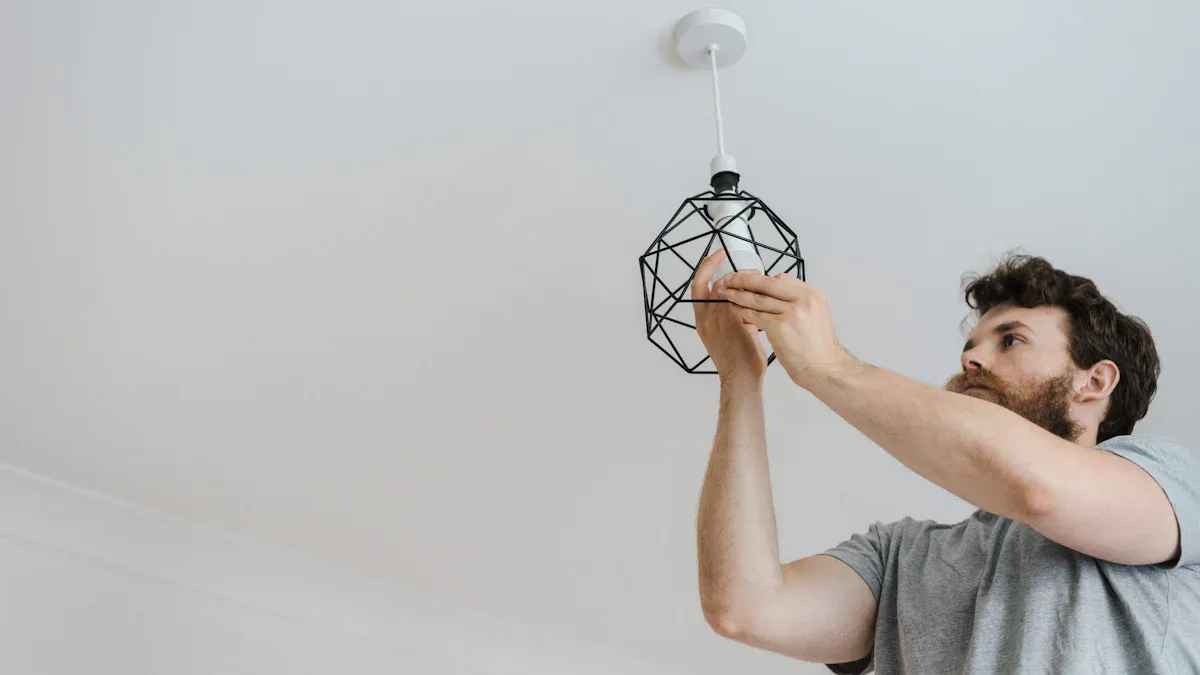
Whether you’re updating your home or workspace, recessed lighting is a smart choice. It saves energy and looks great. Try it as a DIY project or hire a pro to upgrade your space today!
FAQ
How far apart should recessed lights be?
The spacing depends on your ceiling height. Divide the ceiling height by two to find the distance. For example, with an 8-foot ceiling, place lights 4 feet apart. This helps light the room evenly without dark areas.
Can recessed lights go in any ceiling?
Yes, recessed lights work with most ceilings like drywall or plaster. For sloped or low ceilings, use adjustable or wafer lights. Always check the ceiling’s structure and wiring before starting.
Are LED bulbs good for recessed lights?
Yes, LED bulbs are the best choice. They save energy, last longer, and stay cooler than other bulbs. LEDs also come in different colors, so you can pick the right one for your space.
Do recessed lights need upkeep?
Recessed lights need little care. Clean the trims sometimes and replace bulbs when needed. LED lights last a long time, so replacements are rare. Always turn off the power before doing any maintenance.
Can recessed lights be dimmed?
Yes, many recessed lights can dim if you use the right dimmer switch and bulbs. Dimming lets you change the brightness to match your mood or activity.
See Also
Exploring Outdoor LED Lighting: Varieties, Advantages, and Setup Guidance
Understanding LED Replacement Bulbs: Varieties, Perks, and Setup
Comprehensive Overview of LED Area Lighting: Types and Uses
LED Area Lighting: Uses, Advantages, and Installation Guidelines
Choosing GE LED Bulbs: Characteristics, Advantages, and Tips
