Street Light Pole Installation Guide: Best Practices for Durability and Safety

Street light pole installation is essential for maintaining safety and brightness in public spaces. Ensuring that the poles are robust and secure reduces risks such as falling poles or electrical issues. This also extends the lifespan of the poles, resulting in cost savings on repairs.
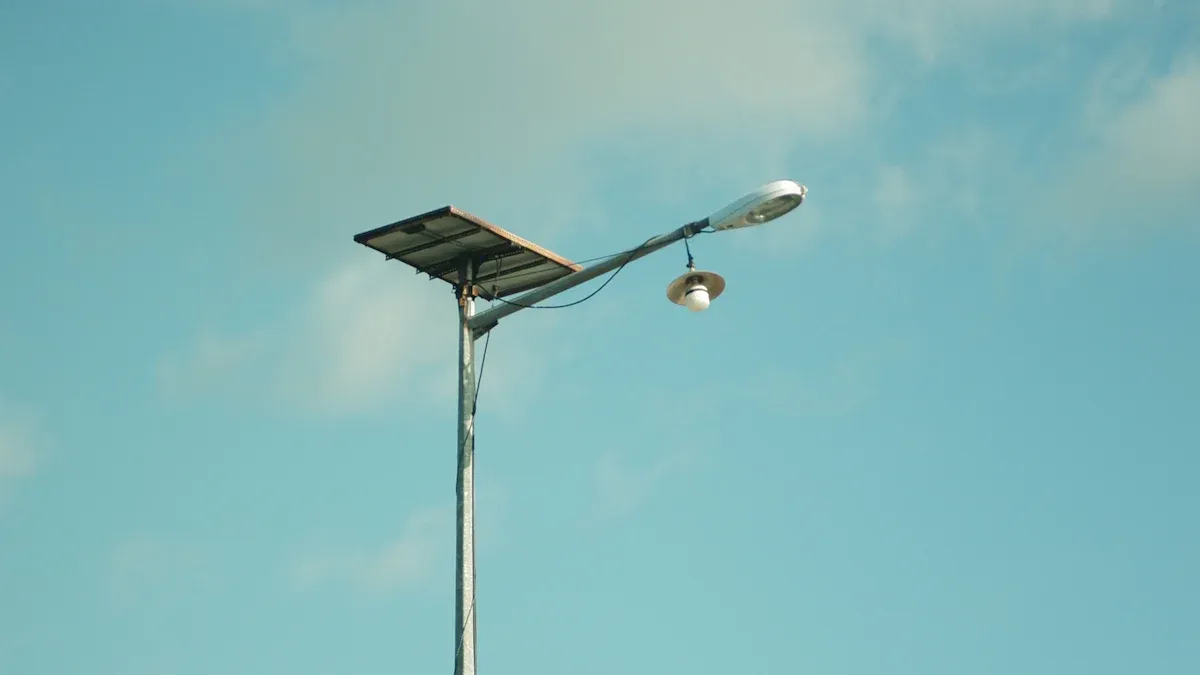
Proper installation is crucial for new systems, including solar lights and LED lights. These lighting solutions require strong foundations and precise placement to function effectively. By prioritizing safety and quality, we can create lighting systems that serve the community for many years to come.
Key Takeaways
Check the site carefully before installing. Look at the soil and wind to make sure poles stay strong and safe.
Pick the right pole materials. Concrete, steel, or aluminum work well depending on the weather and location.
Follow local rules and get permits. This avoids problems and keeps everything safe and legal.
Inspect and fix poles often. Look for rust, loose bolts, or electrical problems to keep lights working safely.
Use the correct installation methods. Burying poles or using anchors makes them stable and long-lasting.
Pre-Installation Steps for Street Light Pole Installation
Site Evaluation and Planning
Before installing street light poles, check the site carefully. This helps place poles in the best spots for safety. Mark where each pole will go. Keep enough space between poles to avoid dark areas. Cities may need closer poles than rural roads.
Think about wind and soil conditions. Sandy soil needs deeper poles because it’s weak. Clay soil holds water, which can make poles unstable. Rocky soil might need special tools for digging. Knowing these details helps make the poles strong and long-lasting.
Obtaining Permits and Approvals
Getting permits is an important step before starting work. Local rules often decide pole height and safety needs. Check local laws to follow the rules. For example, homes and businesses may have different requirements.
After getting permits, make sure your plans match the rules. Check the height, spacing, and type of poles you’ll use. Having the right paperwork avoids legal issues and delays during installation.
Choosing Materials and Pole Types
Picking the right pole material is key for lasting results. Concrete poles are strong and handle bad weather well. Steel poles last long and resist rust if coated. Aluminum poles are light and good for areas with corrosion. FRP poles work well near salty water.
Here’s a simple table comparing pole materials:
Material Type | Lifespan | Best Use |
|---|---|---|
Steel Poles | 20-30 years | City roads, affordable with upkeep |
Aluminum Poles | 30-40 years | Corrosive areas, easy to maintain |
Stainless Steel Poles | Over 40 years | Premium uses, little maintenance needed |
FRP Poles | 30-50 years | Coastal areas, lightweight and durable |
Choosing the right material keeps poles safe and useful for many years.
Getting the Site Ready
Getting the site ready is very important for safe street light poles. Good preparation lowers risks and makes a strong base for the poles. Follow these steps to prepare the site:
Know Local Rules
Learn your city’s rules for pole placement and height. Cities have different safety standards. Following these rules avoids problems like fines or delays.Check Wind Strength
Look at how strong the wind is in the area. Strong winds can push hard on tall poles. Make sure the poles meet the EPA wind standards for your region. This keeps the poles safe and steady.Test the Soil
Study the soil where the poles will go. Different soils need different setups. For example:Sandy soil needs deeper bases to stay firm.
Clay soil holds water, so it may need drains.
Rocky soil might need special tools to dig.
Testing the soil helps find problems and keeps poles secure.
Tip: Use a soil test kit or ask an expert to check the soil’s strength.
Clean and Flatten the Area
Clear away trash, plants, or anything in the way. A clean, flat spot makes it easier to install poles. Mark where each pole will go with stakes or paint to keep them straight.
By getting the site ready, you make a strong base for the poles. This step improves safety and helps the poles last longer.
Installation Techniques for Street Light Poles
Direct Burial Installation
Direct burial is a simple way to install street light poles. In this method, the pole is placed in a hole and secured with backfill. The hole's depth depends on the pole's height and soil type. For example, sandy soil needs deeper holes for stability, while rocky soil may require special tools to dig.
Steps for direct burial installation:
Dig the Hole: Use a digger or auger to make a hole. The hole should be 10% of the pole's height plus two extra feet.
Place the Pole: Put the pole in the hole. Make sure it stands straight using a level.
Fill the Hole: Add soil, gravel, or concrete to the hole. Pack it tightly in layers to remove air gaps.
Check Stability: Push the pole gently to test its steadiness. If it moves, add more backfill and pack it again.
This method works best in areas with firm soil and low wind. It’s not ideal for places with loose soil or strong winds.
Anchor-Based Installation
Anchor-based installation is stronger and more flexible than direct burial. It uses a concrete base and anchor bolts to hold the pole. This method is great for tough soil or areas where poles are replaced often.
Steps for anchor-based installation:
Make the Foundation: Pour a concrete base with anchor bolts. Place the bolts to match the pole's base plate.
Attach the Pole: Line up the pole's base plate with the bolts. Secure it with washers and nuts.
Tighten Bolts: Use a torque wrench to tighten the bolts as instructed. This keeps the pole steady.
Check Stability: Look for any looseness or misalignment. Fix it to ensure the pole is secure.
This method is durable and allows easy pole replacement. It’s often used in cities and busy areas.
Ensuring Alignment and Stability
Keeping poles aligned and stable is very important for safety. Crooked poles can cause uneven lighting and may fall over if unstable.
To align poles, use tools like a level or laser. Check from different angles and adjust as needed. For stability, think about wind, soil, and pole height. Add extra materials like concrete or gravel to strengthen the base if needed.
Studies show ways to improve pole alignment and stability. Here’s a summary of findings:
Study | Method Used | Key Findings |
|---|---|---|
Ai et al. | Performance Testing | Tested smart poles for reliability. |
Zajac and Przybylek | Precise Calculations | Found ways to reduce pole damage. |
Zhang | Stress Simulation | Showed how to manage stress in pole design. |
Pal et al. | Wind Stress Analysis | Found high stress from strong winds. |
Juric and Linden | Fatigue Testing | Predicted how long pole connections last under wind. |
Solari and Pagnini | Wind Vibration Study | Studied how poles react to wind vibrations. |
Balagopal et al. | Predictive Modeling | Predicted pole movement and natural frequency. |
Sun et al. | Bolt Tightening Study | Improved stability by tightening bolts properly. |
Using these methods can make poles safer and last longer. Regular checks and fixes also help keep them in good condition.
Wiring and Electrical Setup
Picking the Right Wires
Choosing good wires keeps the system safe and working well. Strong wires lower the chance of electrical problems and last longer. Always pick wires that meet safety rules for insulation and strength.
Here’s a simple wiring guide:
Specification Type | Requirement |
|---|---|
Insulation Testing | Wires must pass a test with at least 250,000 ohms resistance. |
Conduit Specifications | Underground wires need HDPE, PVC, or steel conduits with proper spacing and cover. |
Wire Type | Use THHN copper wire, 600 volts, No. 10 AWG for poles; underground cables should be XLP-Type USE, 600 volts, No. 8 AWG. |
Using these wires helps the system handle tough weather and stay safe.
Following Electrical Rules
Following electrical rules makes the system safe and legal. These rules help avoid accidents and keep everything working right.
To follow the rules:
Use strong connectors and the right size cables.
Make sure all parts are approved by OSHA-certified labs.
Follow LED light rules to meet safety standards.
Studies show many freeway lights don’t meet safety rules. Fixes like adding poles or changing brightness are often needed to follow the law.
Checking for Safety
Testing the system is the last step to make sure it’s safe. Careful checks can find problems before turning the lights on.
Steps for testing:
Test insulation to check grounding and wire safety.
Look at all connections to ensure they’re tight and straight.
Run the system to see if it works well under load.
Regular tests keep the system safe and save money on repairs. A tested system keeps people safe and works better for everyone.
Overcoming Challenges in Street Light Pole Installation
Handling Soil and Ground Issues
The type of soil affects how stable poles are. Check the soil before starting to avoid problems later. Sandy soil is weak and needs deeper bases. Clay soil holds water, which can weaken poles. Rocky soil might need special digging tools.
To handle these issues:
Test the soil: Use a kit or hire an expert to check how strong the soil is.
Pick the right base: For weak soil, use concrete or deeper bases.
Add drains: In clay soil areas, install drains to stop water from pooling.
Tip: Pack the soil tightly after installing poles to make them steady.
Dealing with Weather Problems
Bad weather like wind, rain, or snow can harm poles. Plan for these issues when installing poles. Wind can push hard on tall poles, making them bend or fall.
Here’s how to deal with weather problems:
Follow wind rules: Make sure poles meet EPA wind standards for your area.
Use rust-proof materials: In rainy or snowy places, pick stainless or coated steel poles.
Add dampers: These reduce shaking from strong winds in windy areas.
Note: Check poles after storms to find and fix damage early.
Fixing Pole Misalignment
Crooked poles look bad and can be unsafe. They also mess up lighting. Check alignment during and after installation to avoid this.
To fix crooked poles:
Use alignment tools: Tools like laser levels help keep poles straight.
Adjust the base: Loosen bolts and move the pole if it’s not straight.
Check after filling: Packed soil can shift poles. Recheck alignment after backfilling.
Reminder: Fixing crooked poles right away avoids bigger problems later.
By solving these problems, you can make street light poles safer and last longer.
Maintenance Practices for Long-Term Durability
Regular Inspections and Safety Checks
Checking street light poles often keeps them safe and strong. Inspect them at least twice a year to find problems early. Look for cracks, rust, or loose bolts. These issues can weaken the pole and cause accidents.
Also, check the electrical parts during inspections. Look at wires, connectors, and grounding for damage or wear. Broken electrical systems can cause outages or fires. Test how bright the lights are and if they dim over time. Good LED lights should lose no more than 30% brightness after 100,000 hours. Regular checks help the system work well and stay safe.
Tip: Write down all inspections. This helps track problems and fixes.
Cleaning and Corrosion Prevention
Cleaning poles and stopping rust makes them last longer. Dirt and pollution can build up and cause rust or damage. Clean poles often with soft brushes or pressure washers. For tough rust, use sandblasters or chemical cleaners. These tools worked well on old gas lamps in Bourbon Street.
To stop rust, add protective coatings like powder coating or galvanization. These coatings block moisture and other harmful elements. In humid or salty areas, use stainless steel or aluminum poles. These materials naturally resist rust.
Note: Use gentle cleaning tools to avoid scratching the pole or coating.
Repairing and Replacing Components
Fixing and replacing parts on time keeps poles working safely. If you see broken parts like LED drivers or wires, replace them quickly. Check bolts, nuts, and base plates often to keep the pole steady.
Check light brightness and dimming to know when to replace lights. If lights get too dim, install new LED lamps. Good LEDs last years, but regular checks ensure they work properly.
Reminder: Keep extra parts ready for quick fixes. This avoids long delays and keeps lights working.
By following these steps, you can make street light poles last longer and stay safe. Regular care saves money on repairs and keeps the community well-lit for years.
Using the right steps for street light pole setup keeps them safe and strong. Good methods lower risks, make lights work better, and help poles last longer. Focusing on quality during setup builds a system that helps people for many years. Checking and cleaning the poles often keeps them in great shape and avoids expensive fixes. Taking care of them early ensures bright and safe spaces for all.
FAQ
What is the best material for street light poles in coastal areas?
Aluminum or FRP poles are great for coastal areas. These materials resist rust from salty air and wet weather. Aluminum is light and simple to care for, while FRP is strong and long-lasting.
How deep should the foundation be for street light poles?
The depth depends on the pole’s height and soil type. A good rule is 10% of the pole’s height plus two feet. For sandy soil, dig deeper to keep the pole steady.
How often should street light poles be inspected?
Check poles at least twice a year. Look for cracks, rust, loose bolts, or electrical problems. Regular inspections stop accidents and help poles last longer.
Can LED lights be used for street lighting?
Yes, LED lights are great for street lighting. They use less power, last longer, and give bright, steady light. Pick LEDs that follow outdoor safety rules.
What should you do if a pole becomes misaligned?
Use tools like laser levels to check if the pole is straight. Loosen bolts, adjust the base, and check again after filling the hole. Fix crooked poles quickly to avoid dangers.
See Also
Choosing The Right Street Light Post: Key Factors To Consider
Guide To Proper Installation Of Light Pole Posts
Evaluating Lighting Poles: Finding The Best Value For Projects
Ultimate Guide To LED Area Lights: Types And Installation Tips
